Our Documentation
Everything you want to know about AlgoBot
TradingView
- Open a new chart with the coin you want to create a setup for. In this case we use BTCUSDT as an example, you can choose the timeframe as you wish.
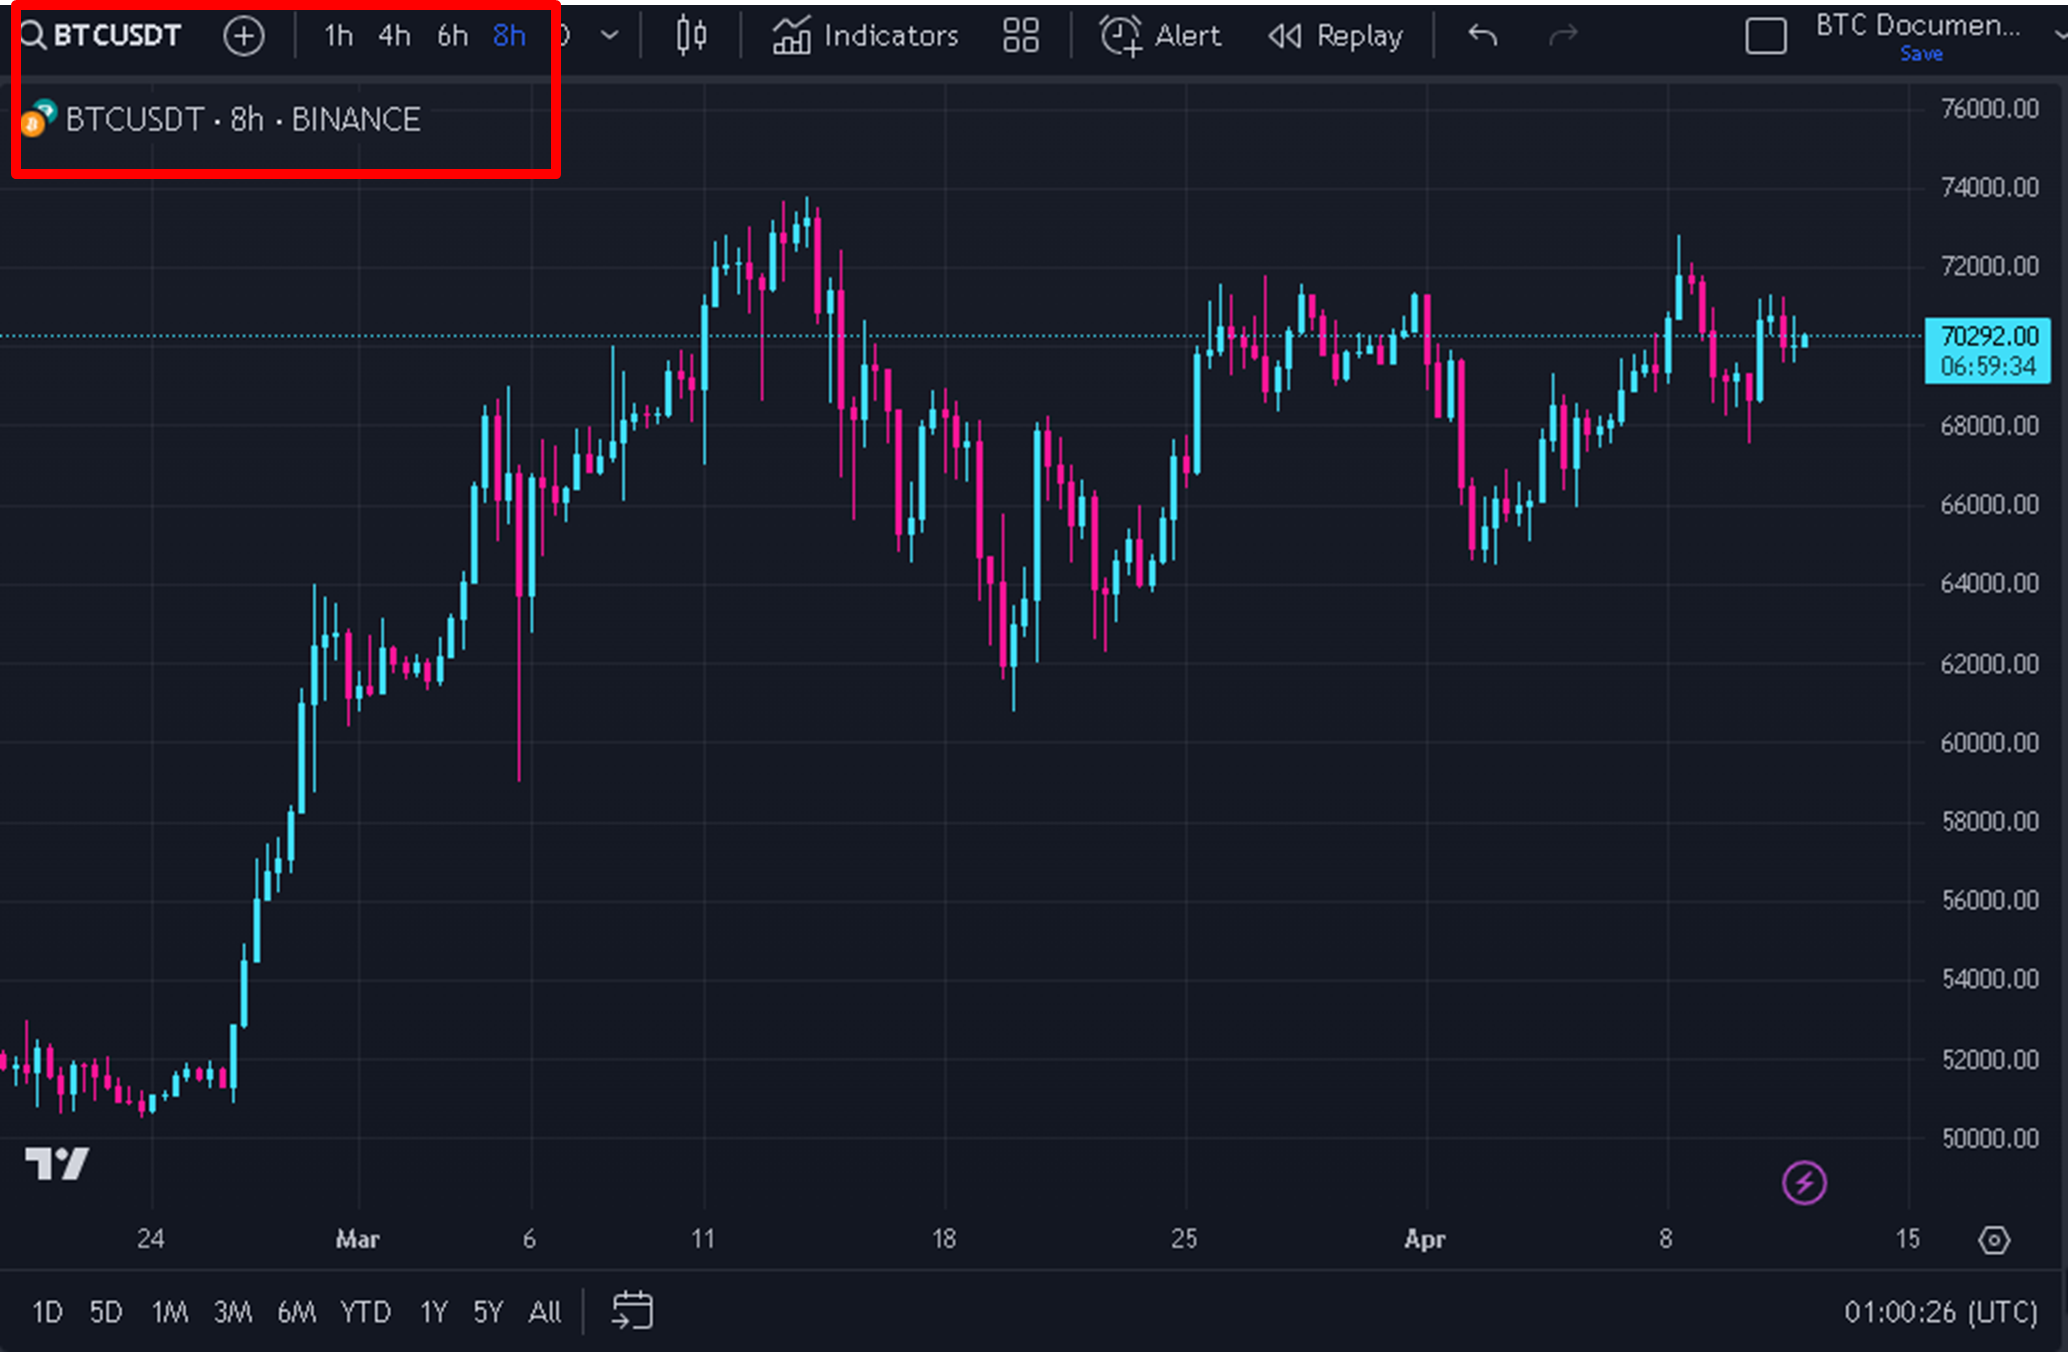
- Click on indicators on the top bar and search for Algobot

- Load the “AlgoBot” indicator onto the chart by double clicking it
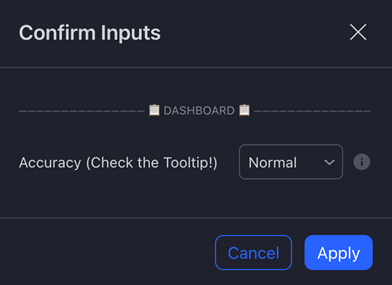
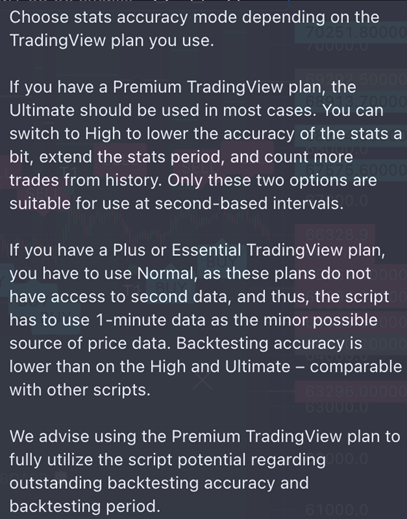
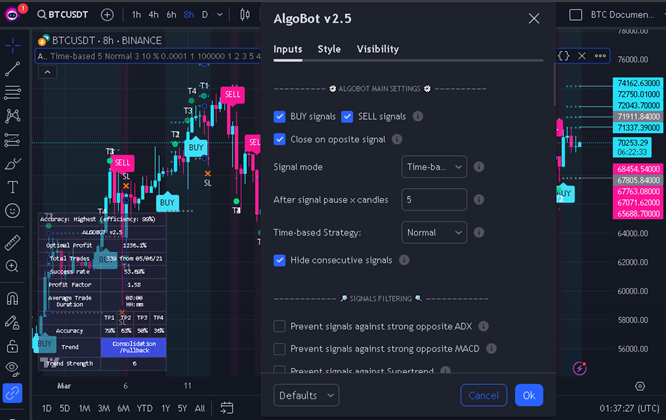
Check the tooltip for the necessary information in order to know what to choose
- After choosing the correct accuracy you will see Algobot added to the chart
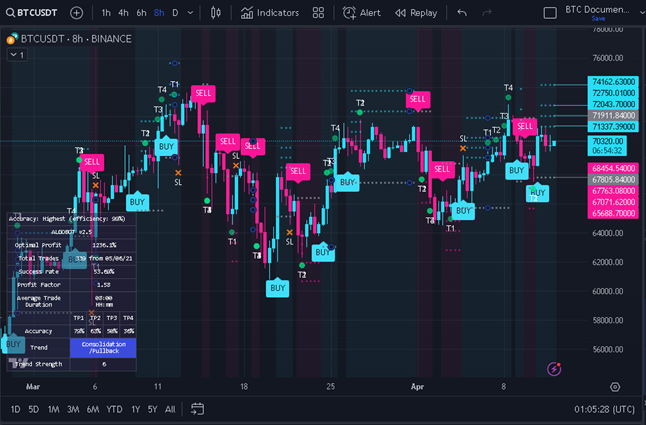
- Create a setup to your satisfaction or use the default values
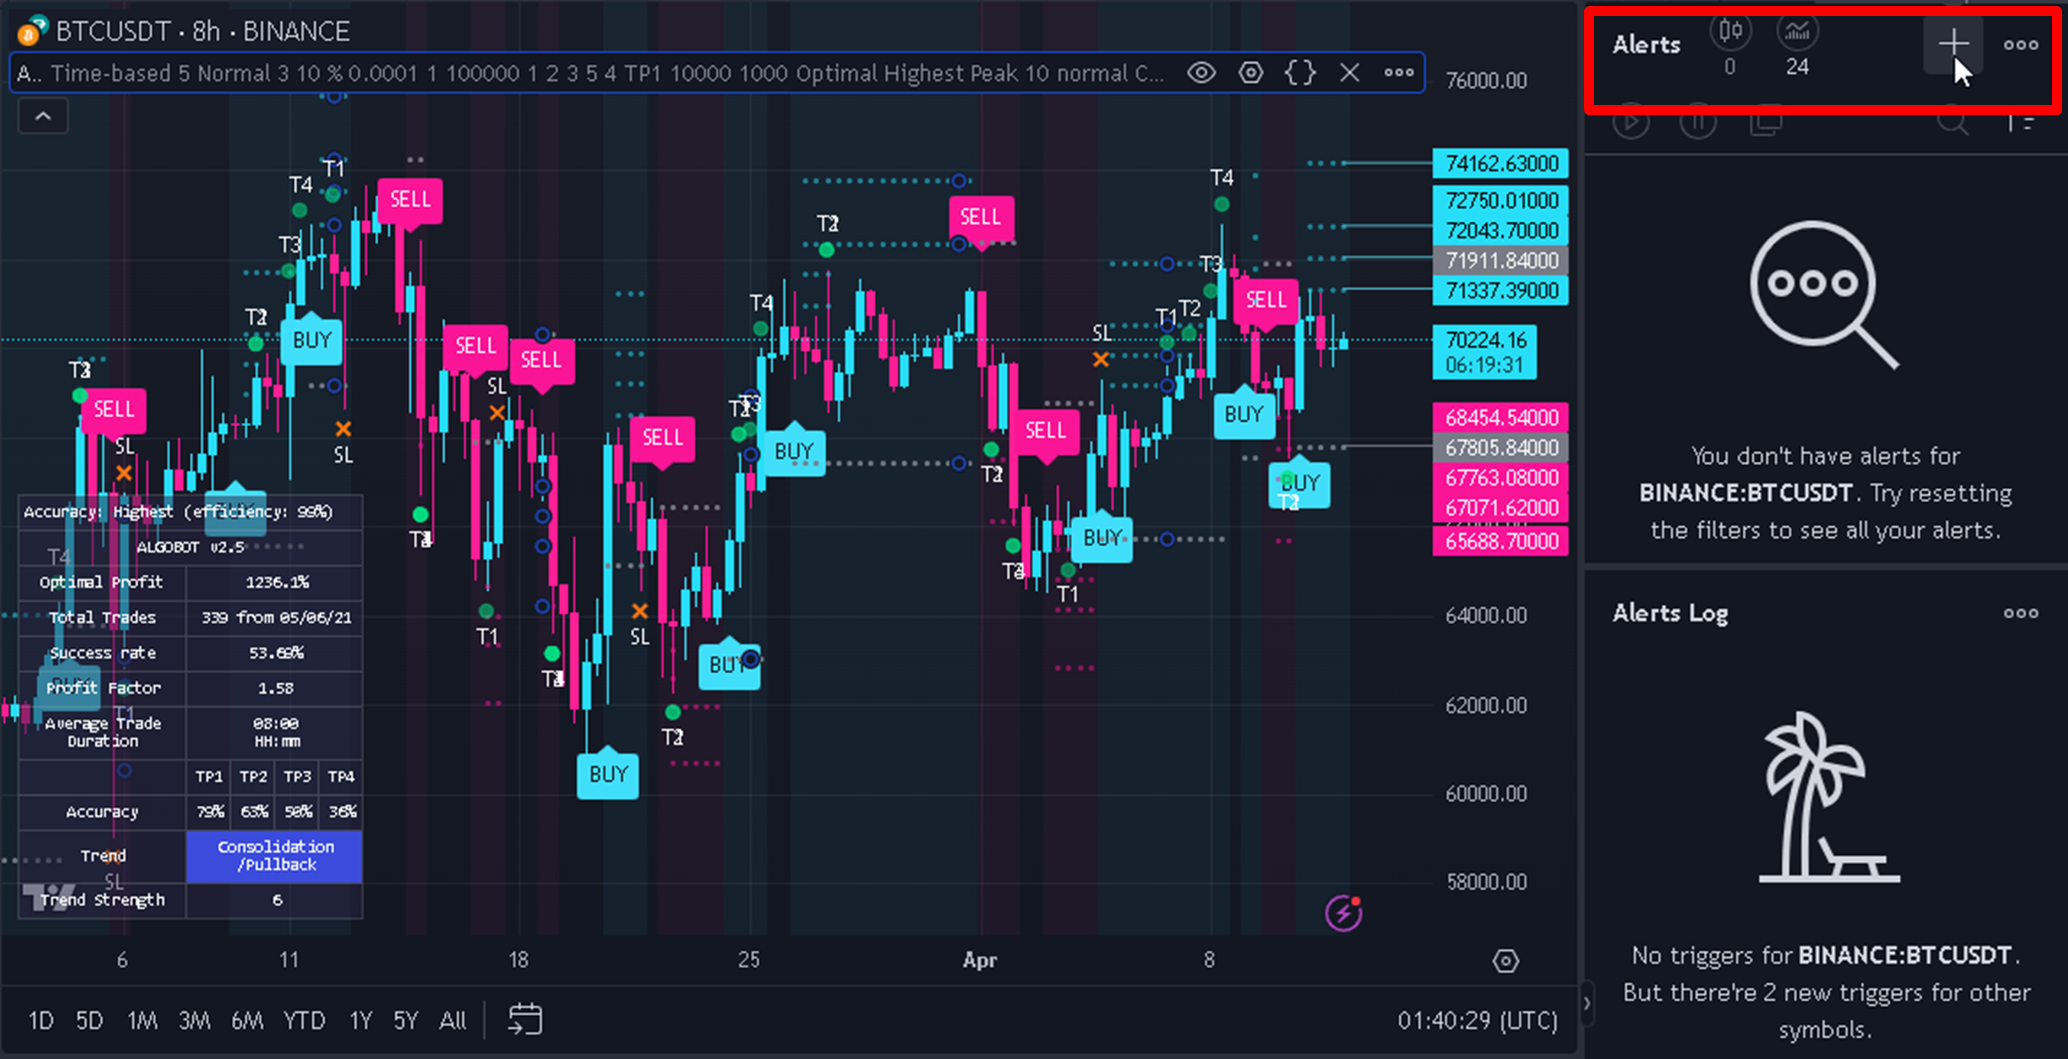
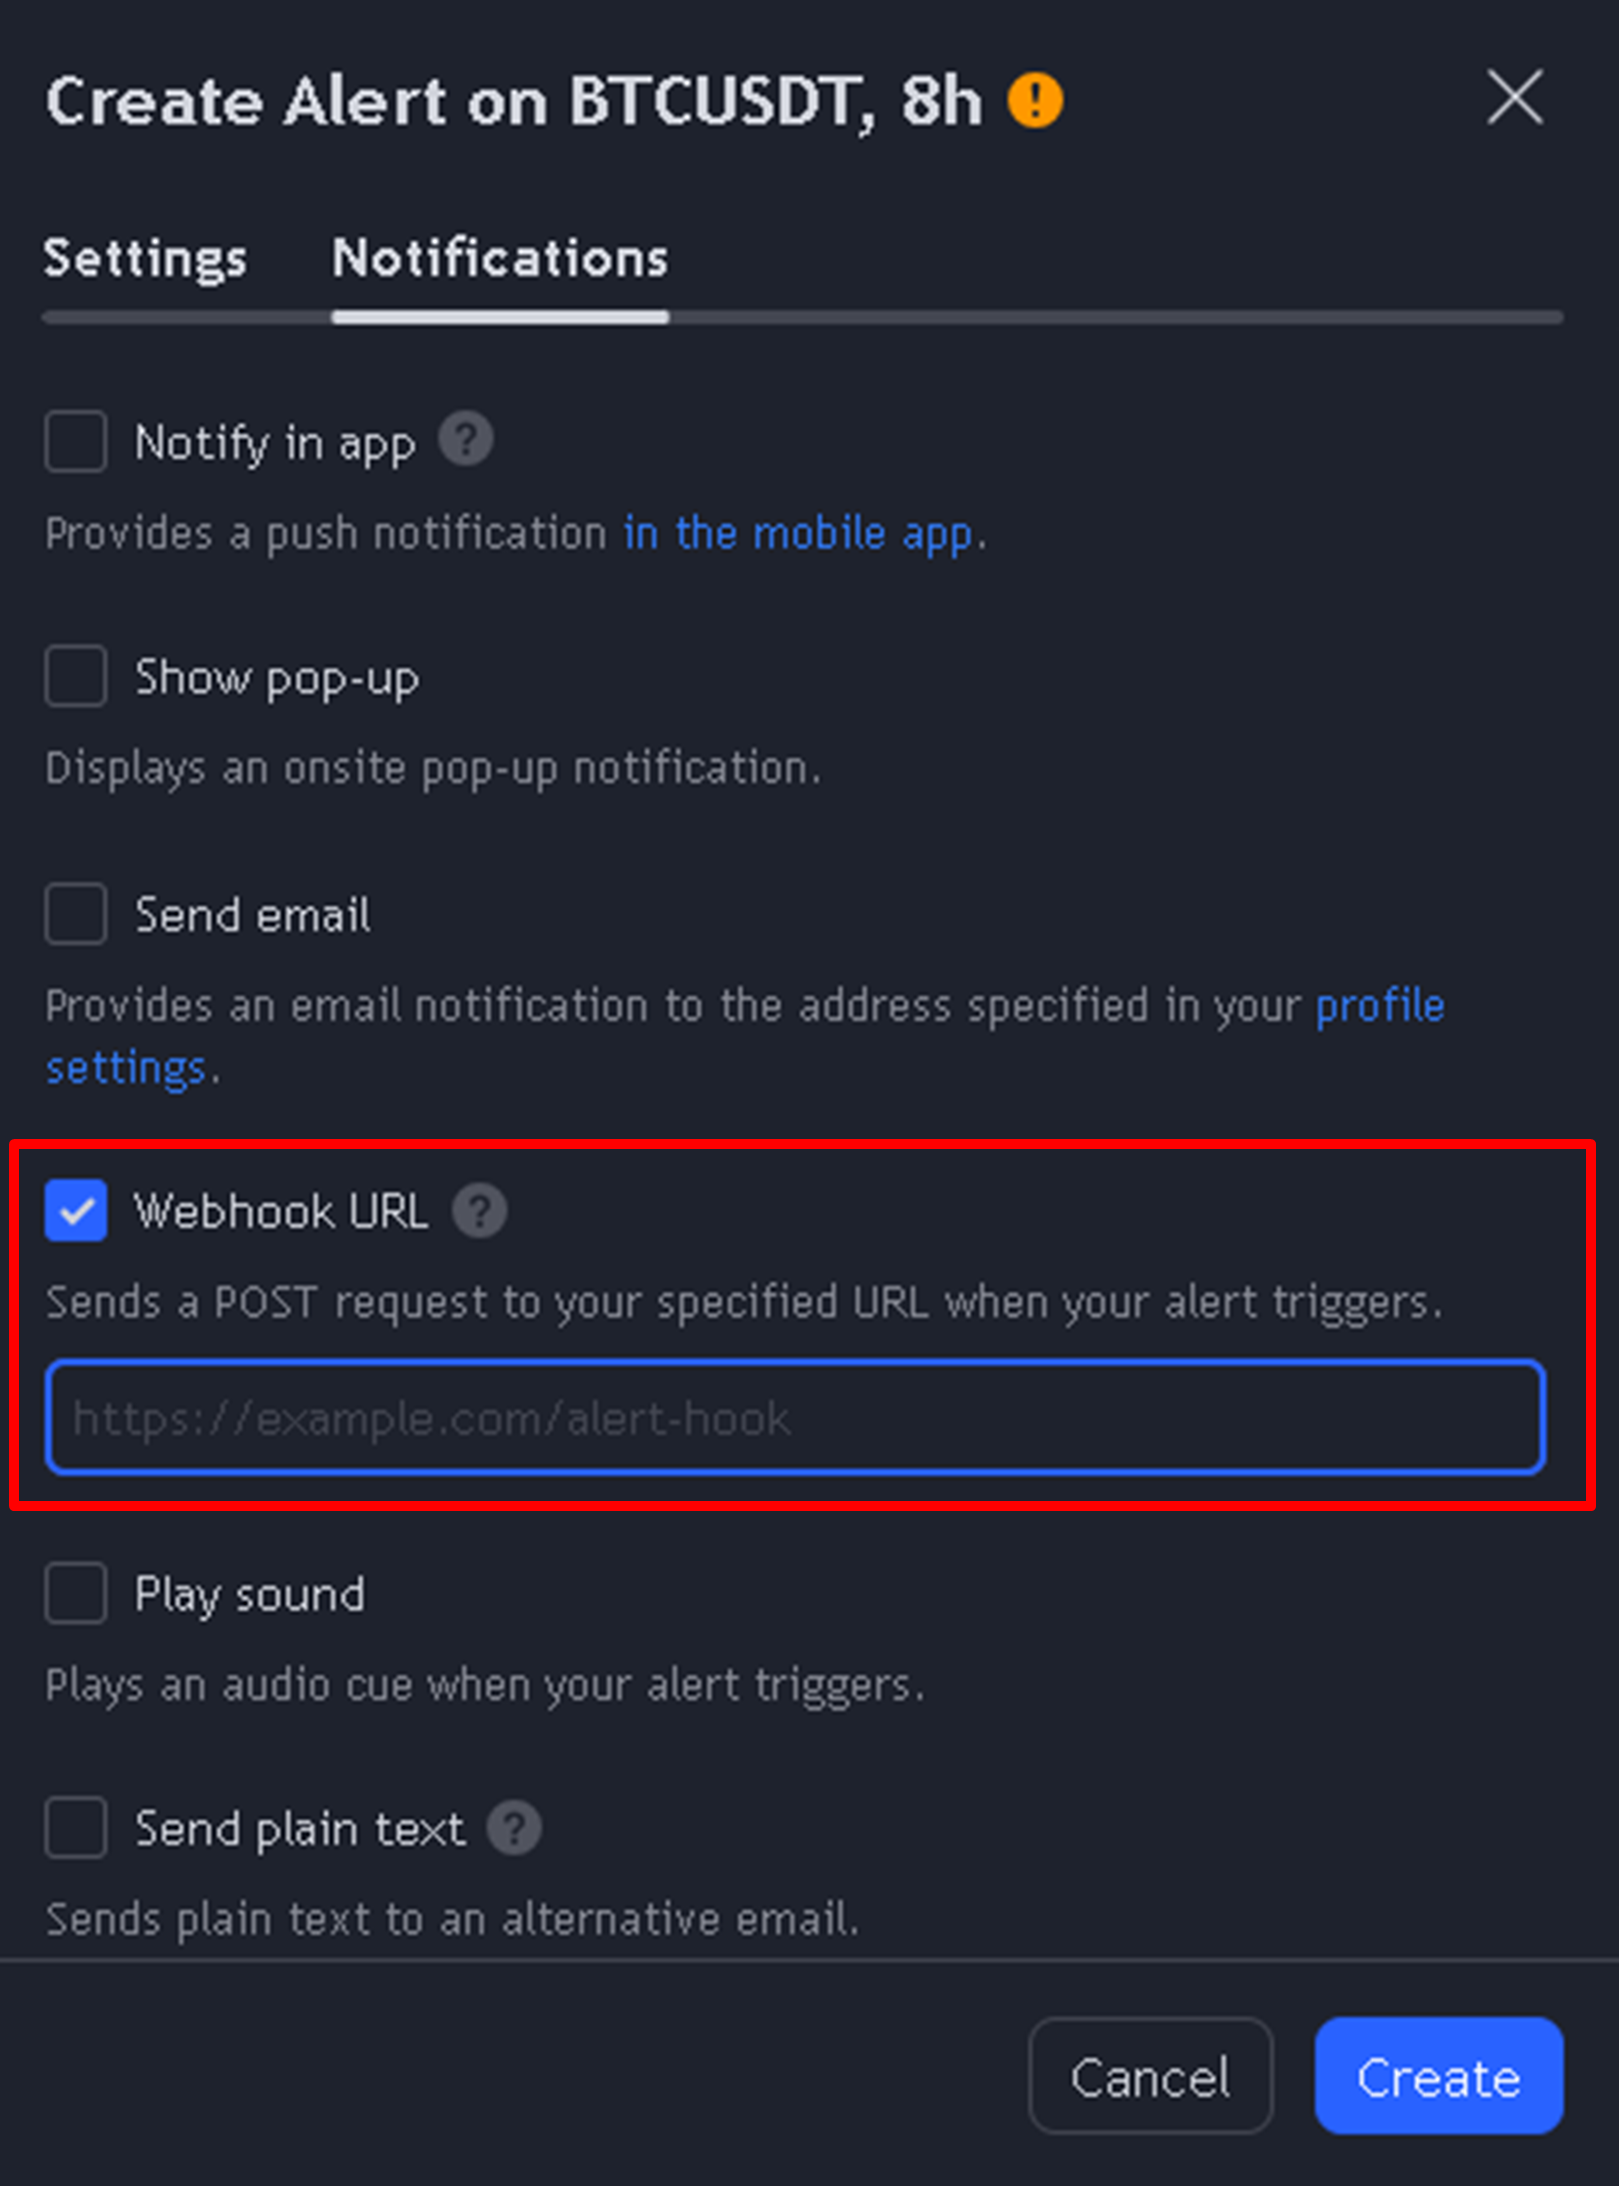
- Create an alert on the Algobot indicator
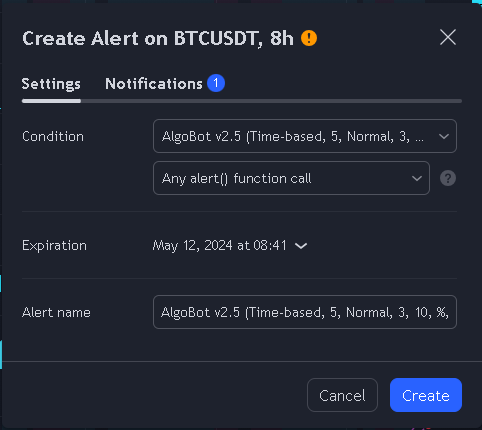
- Send it to the MAKE webhook that you created in MAKE (see MAKE tutorial)
- Wait for BUY/SELL signals to be triggered and appear in your private Telegram
- Trade the signals manually, or automatically with Cornix (See Cornix tutorial).
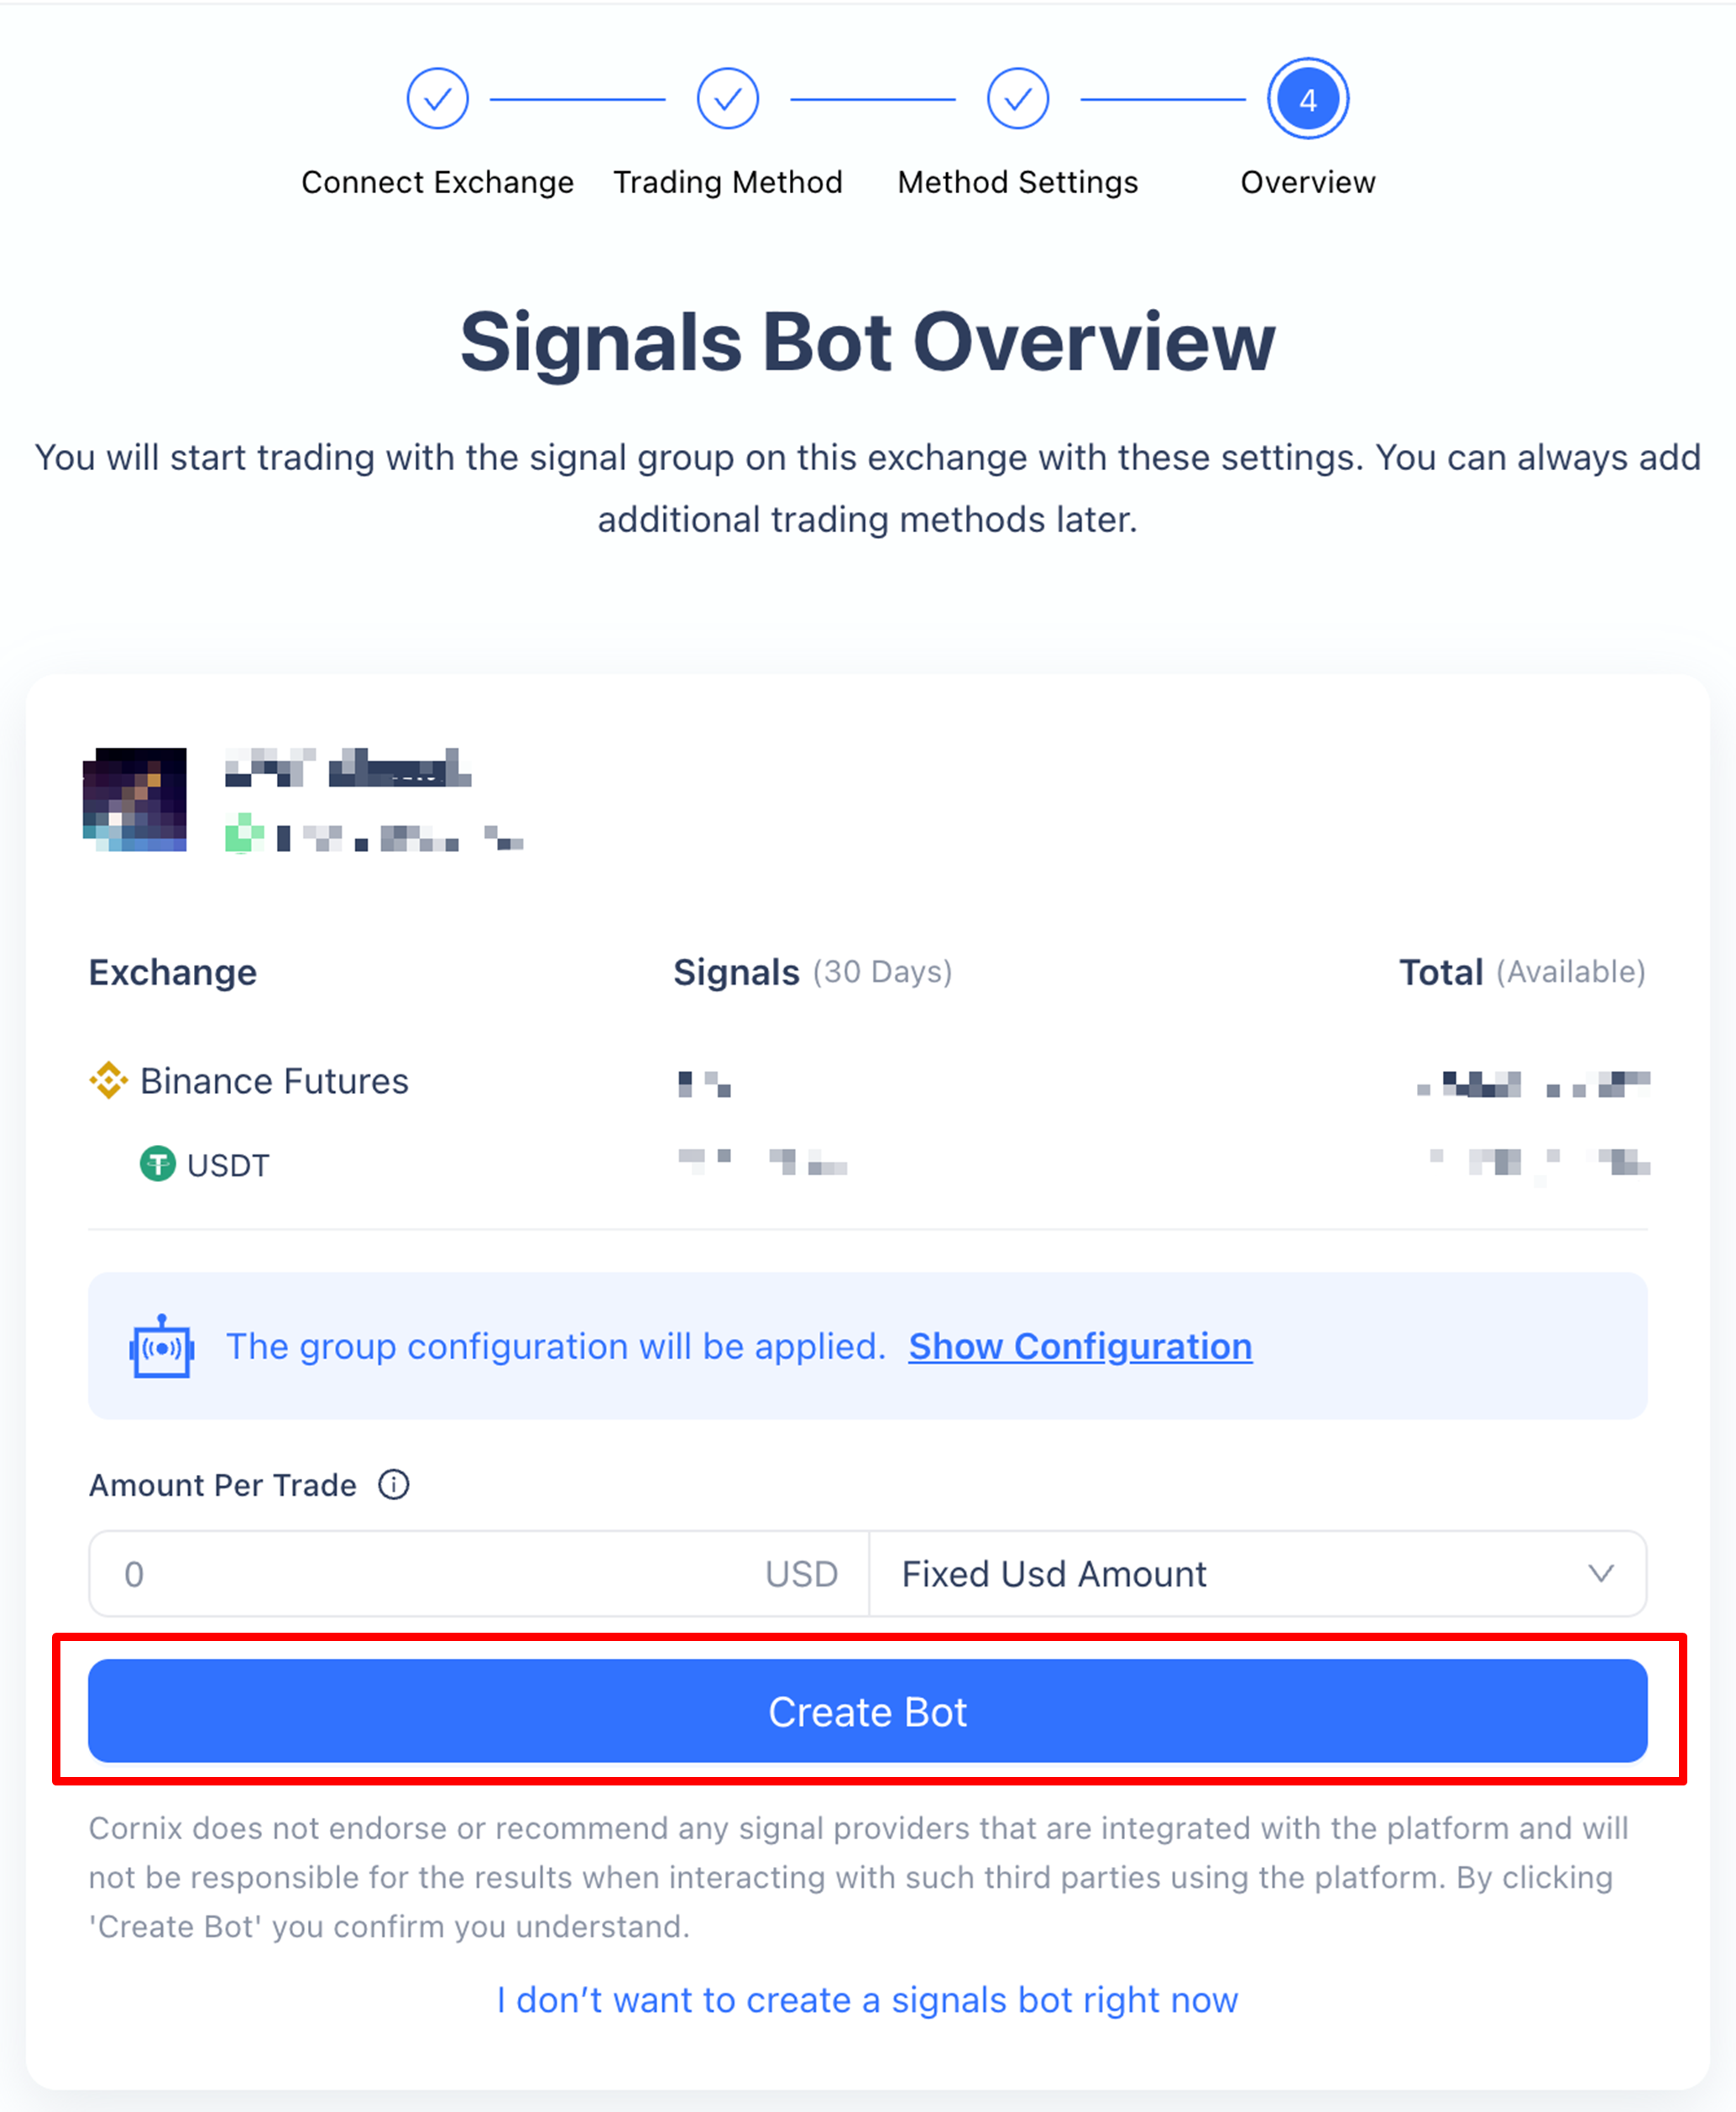
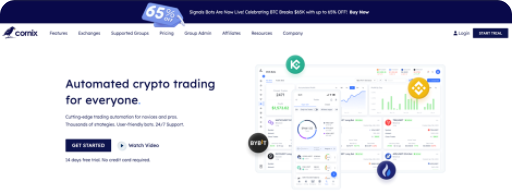
Cornix: connect with Binance
When you visit www.cornix.io, start your 14-day free trial in the top right screen or subscribe to a paid plan right away. Use the link (for new users) or enter code B8ADFCE7 to extend your current subscription and receive 10% off.
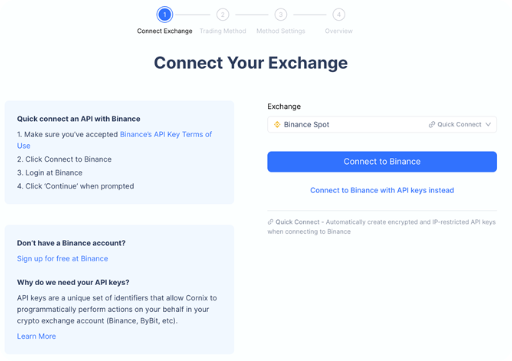
First, we need to connect an exchange to the Cornix platform.
Connect CORNIX with Binance
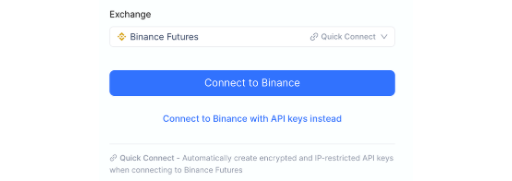
- Choose Binance Quick Connect as the fastest method.
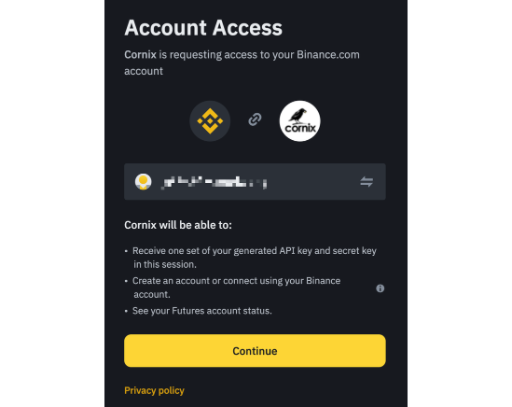
 A pop up window asks to login with your Binance credentials. Log in and allow Cornix to access the necessary actions.
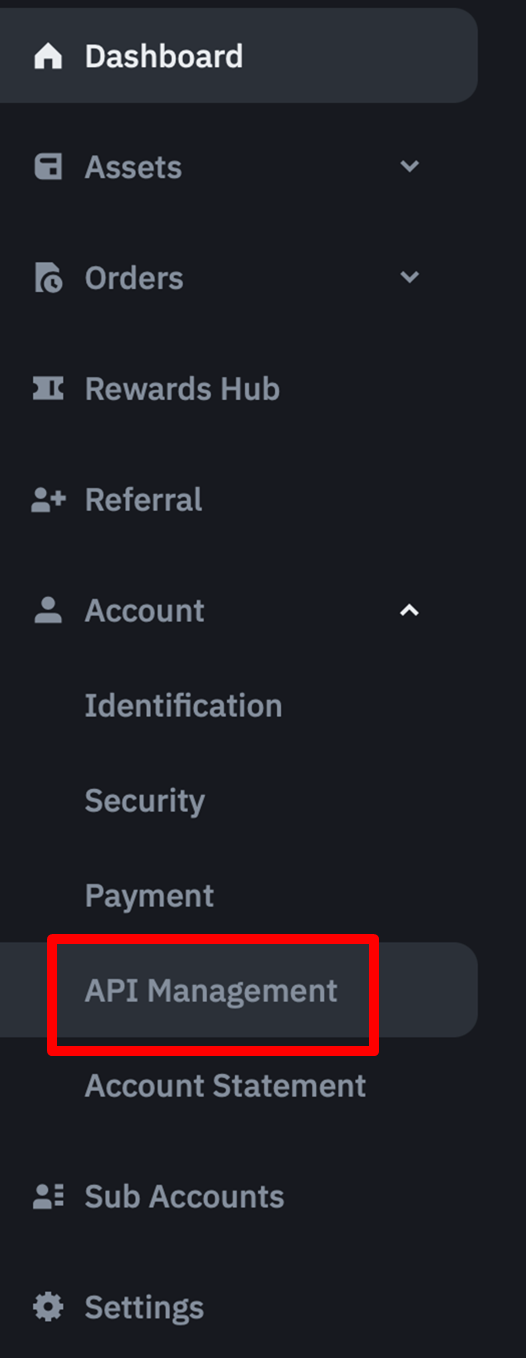
- Choose the API keys method as an alternative: go to dashboard and choose API management in Account settings
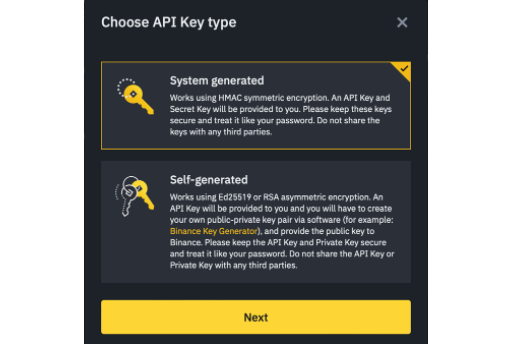
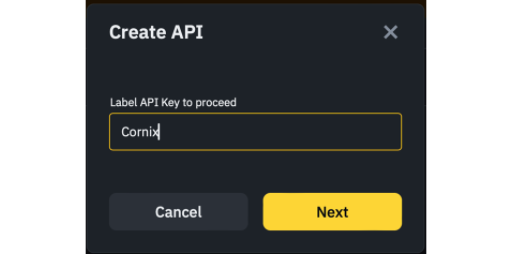
Choose create API in the top right corner

Choose system generated API keys.
Give your keys a name (for example “Cornix”)
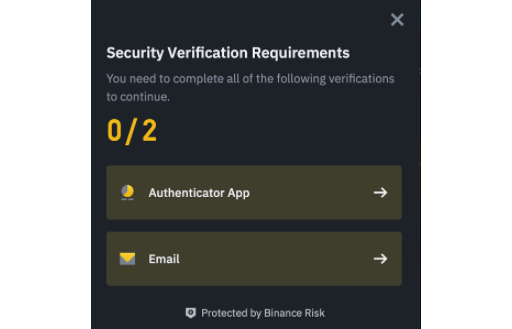
Complete the necessary security measurements to continue.
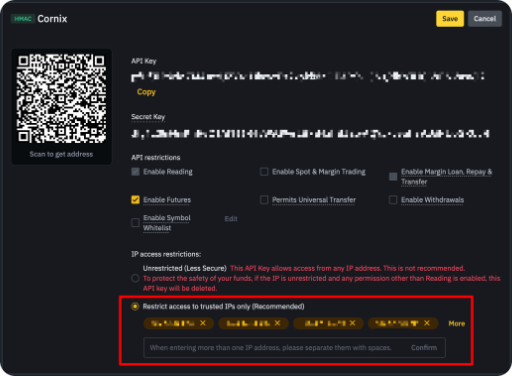
The initial screen will look like this:
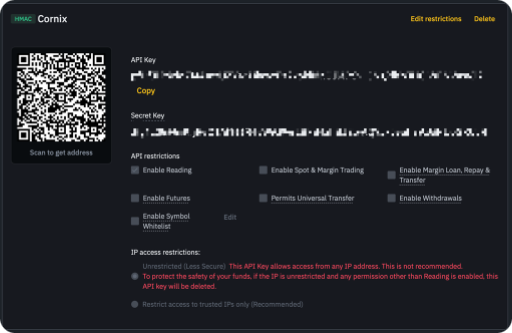
First copy the Cornix’s IP addresses from the login page that you still have open.
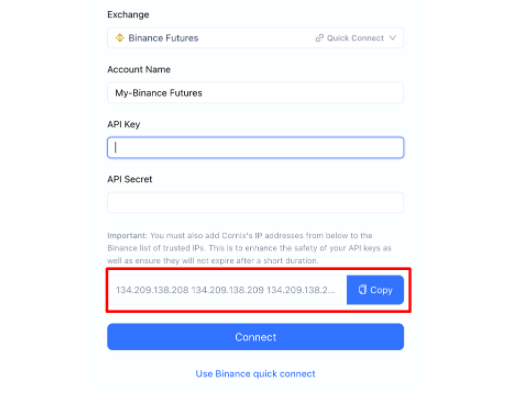
and paste them in the “Restrict access to trusted IPs only” field in your Binance API screen.
Then check “Enable Futures” and “Enable Reading”
Then paste API key and API secret in the correct fields.
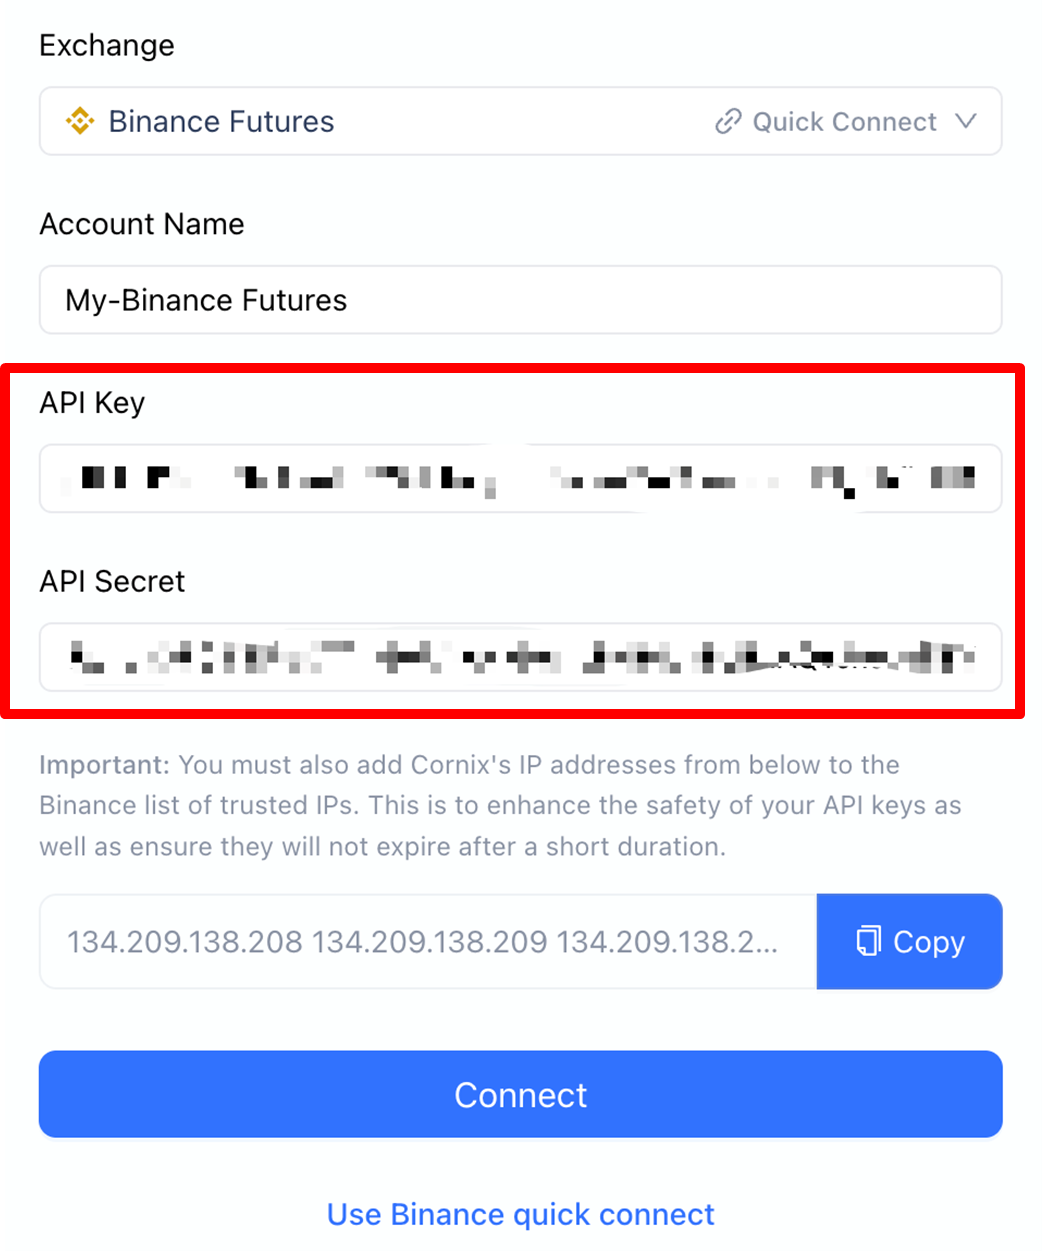
Finally press “Connect”
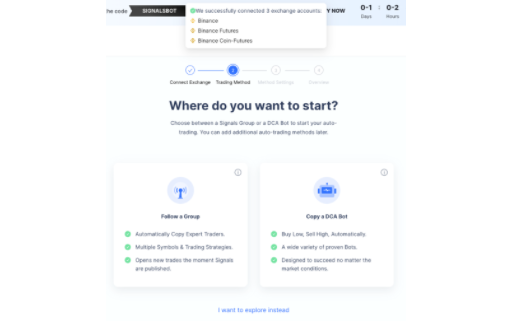
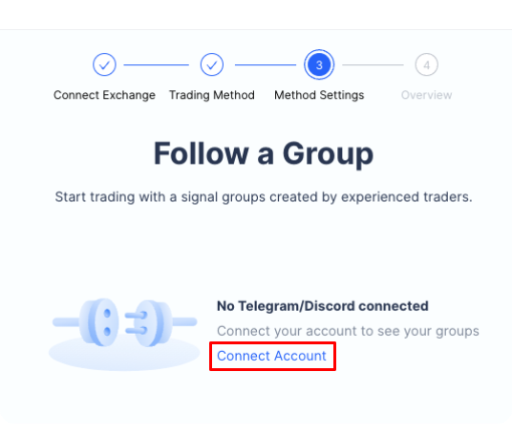
Press “Folllow a group” and “Connect Account”
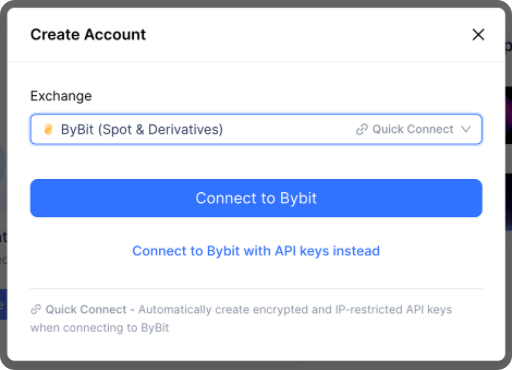
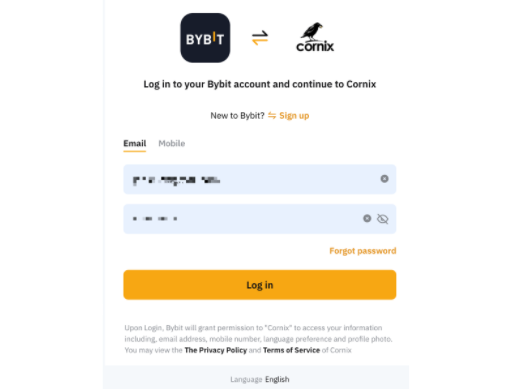
Cornix: connect with Bybit
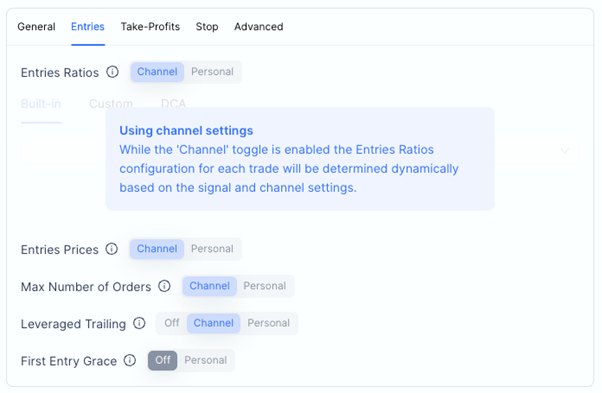
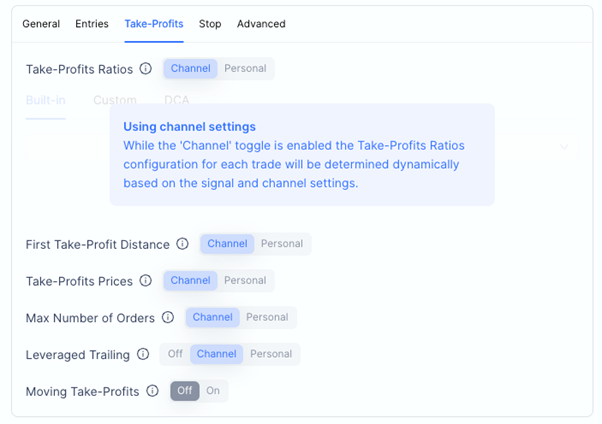
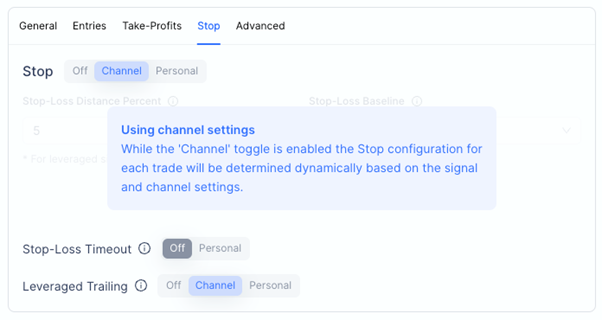
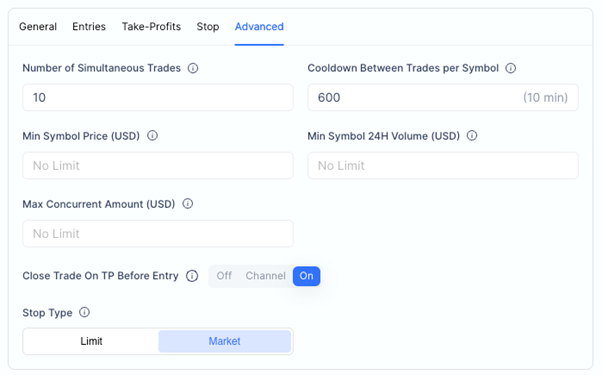
Cornix: Algobot configuration – Recommended Settings
we recommend the following configuration (advanced settings):

MAKE: connect Algobot with Telegram
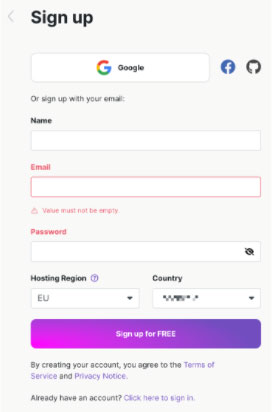
- Create a new account on https://www.make.com/en/register?pc=algobot
- Create a new scenario on the top right of the page
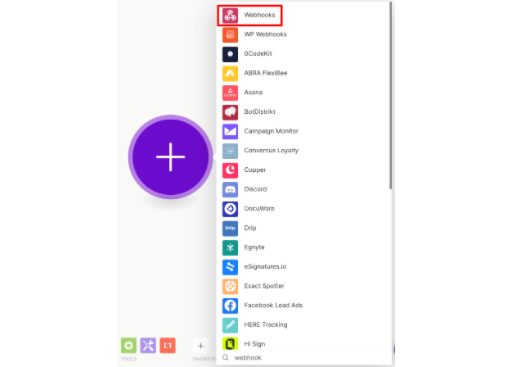
- Add a new webhook module
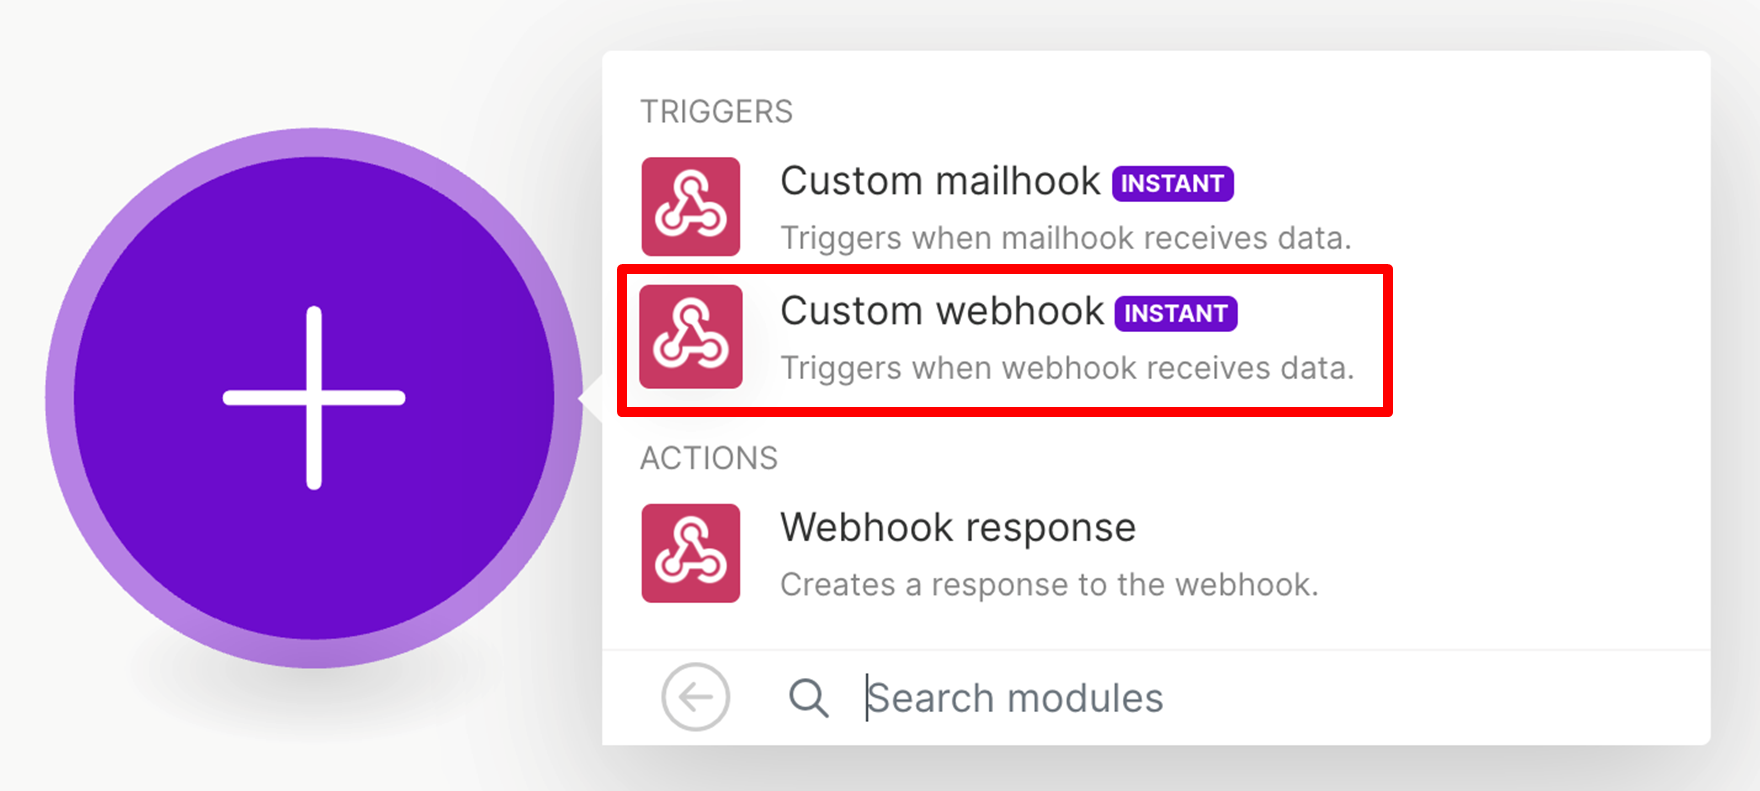
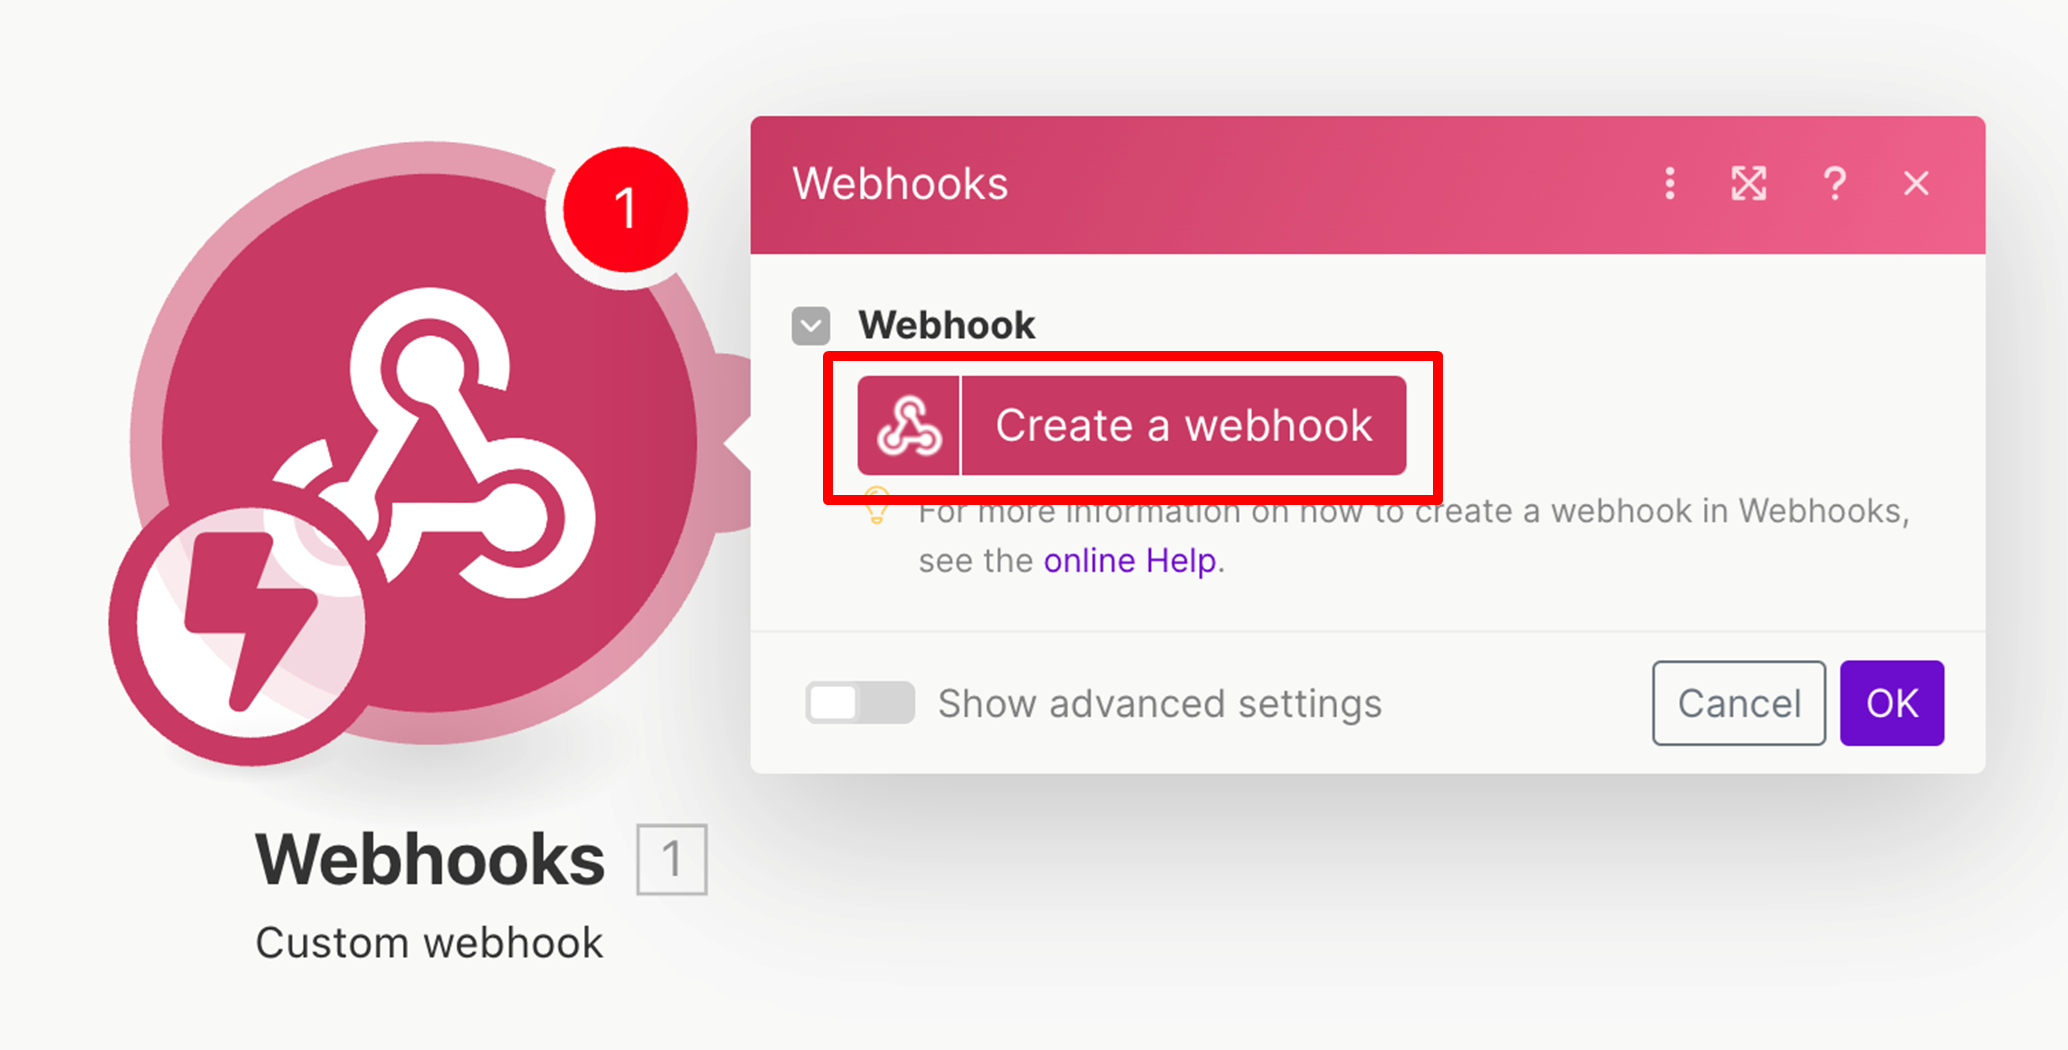
- Choose “Custom webhook”
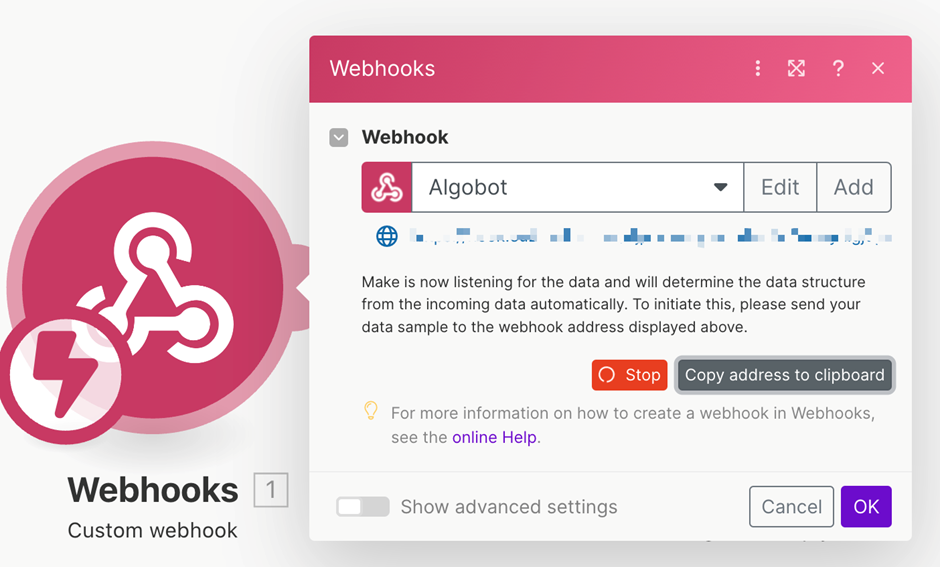
- Click “Create a webhook” and MAKE will generate a random webhook address
- Give the webhook a name, for example “AlgoBot”
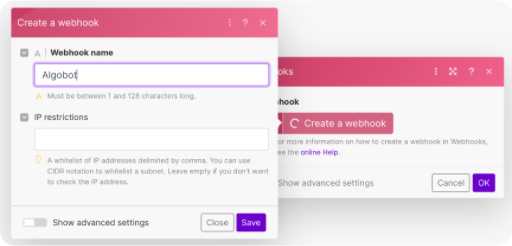
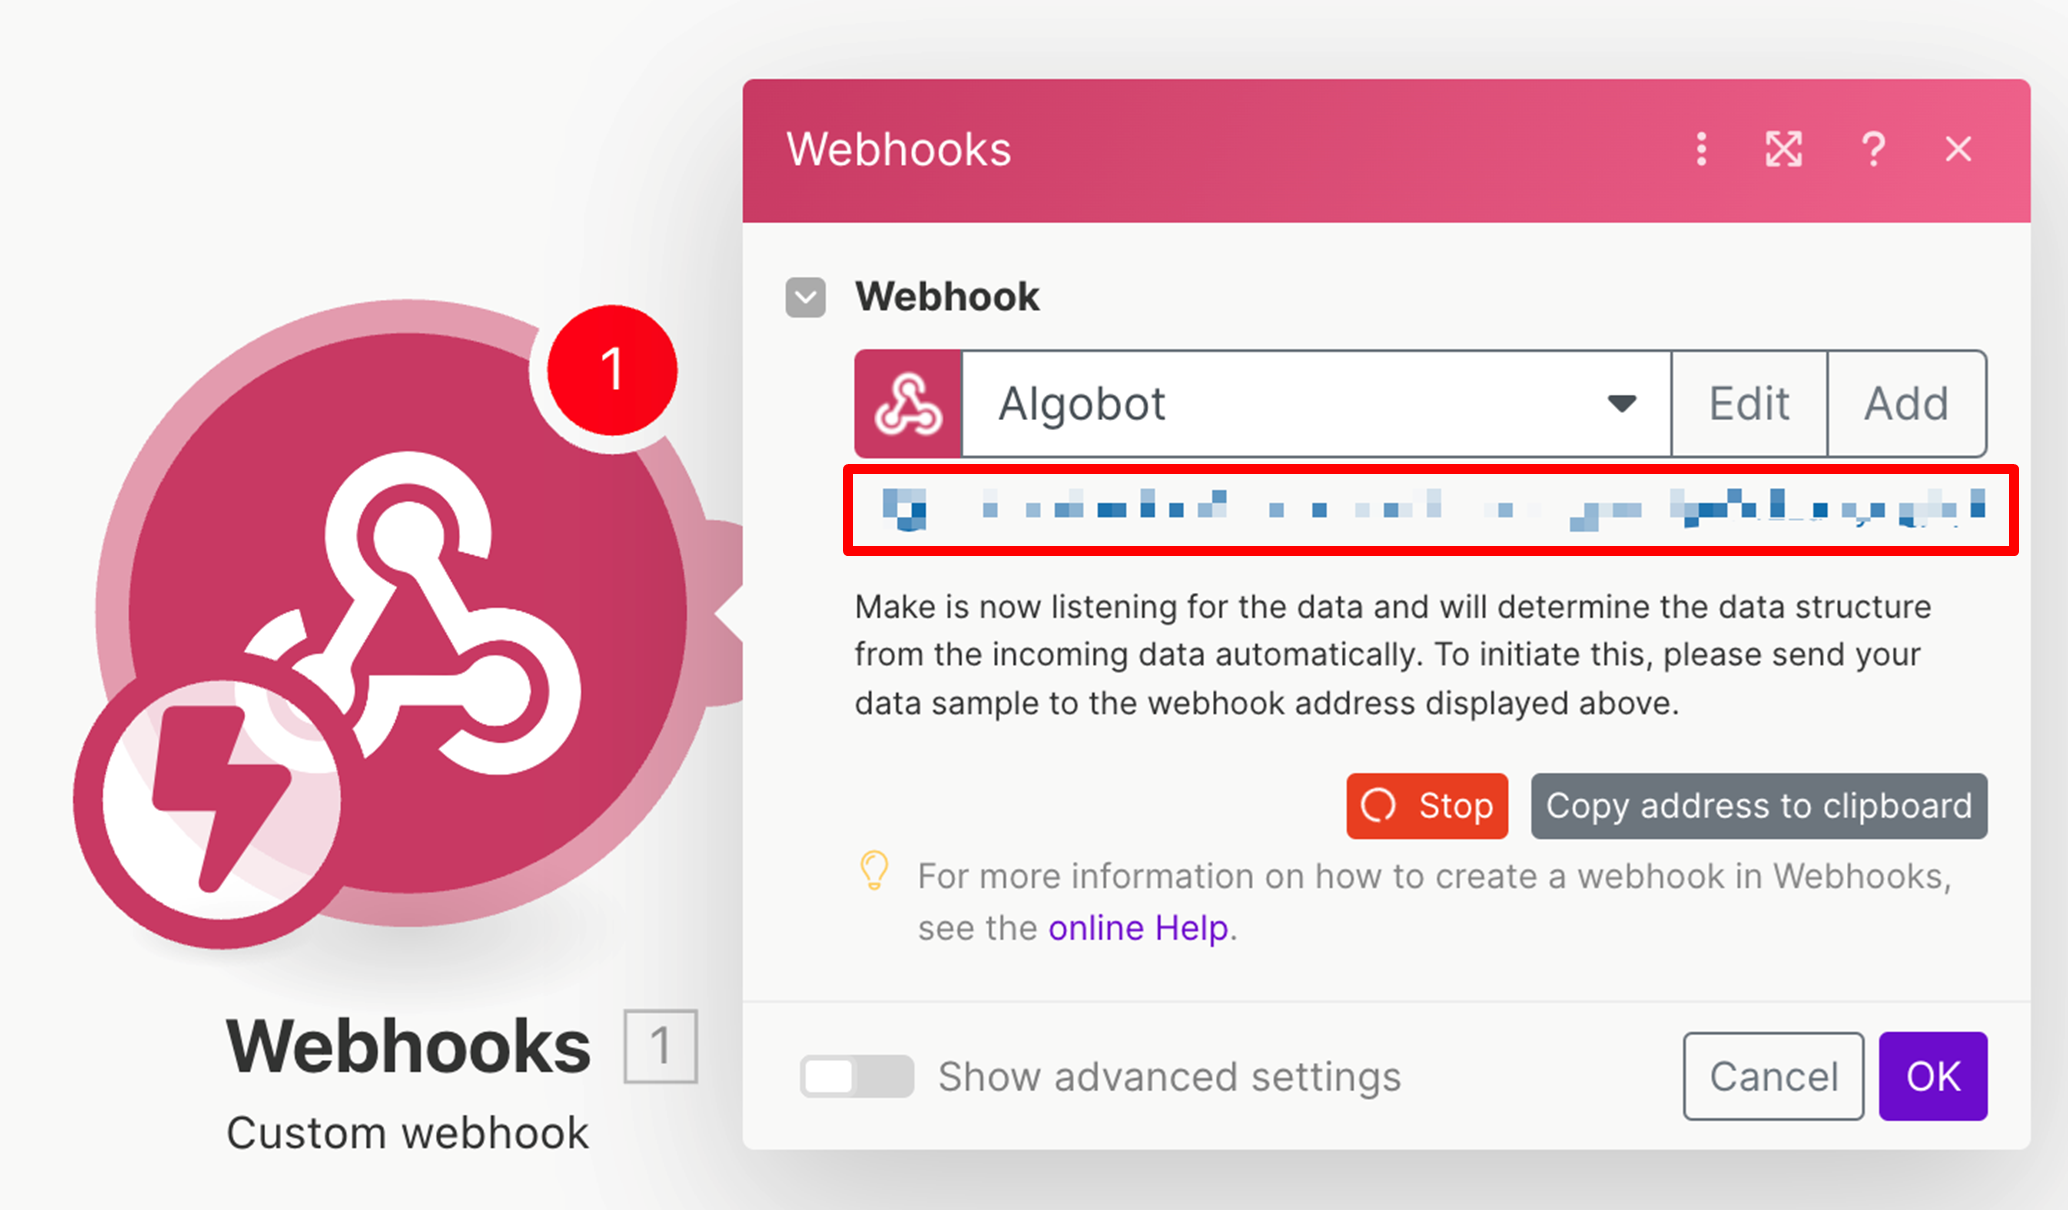
- Click “Save” and your private webhook address is created
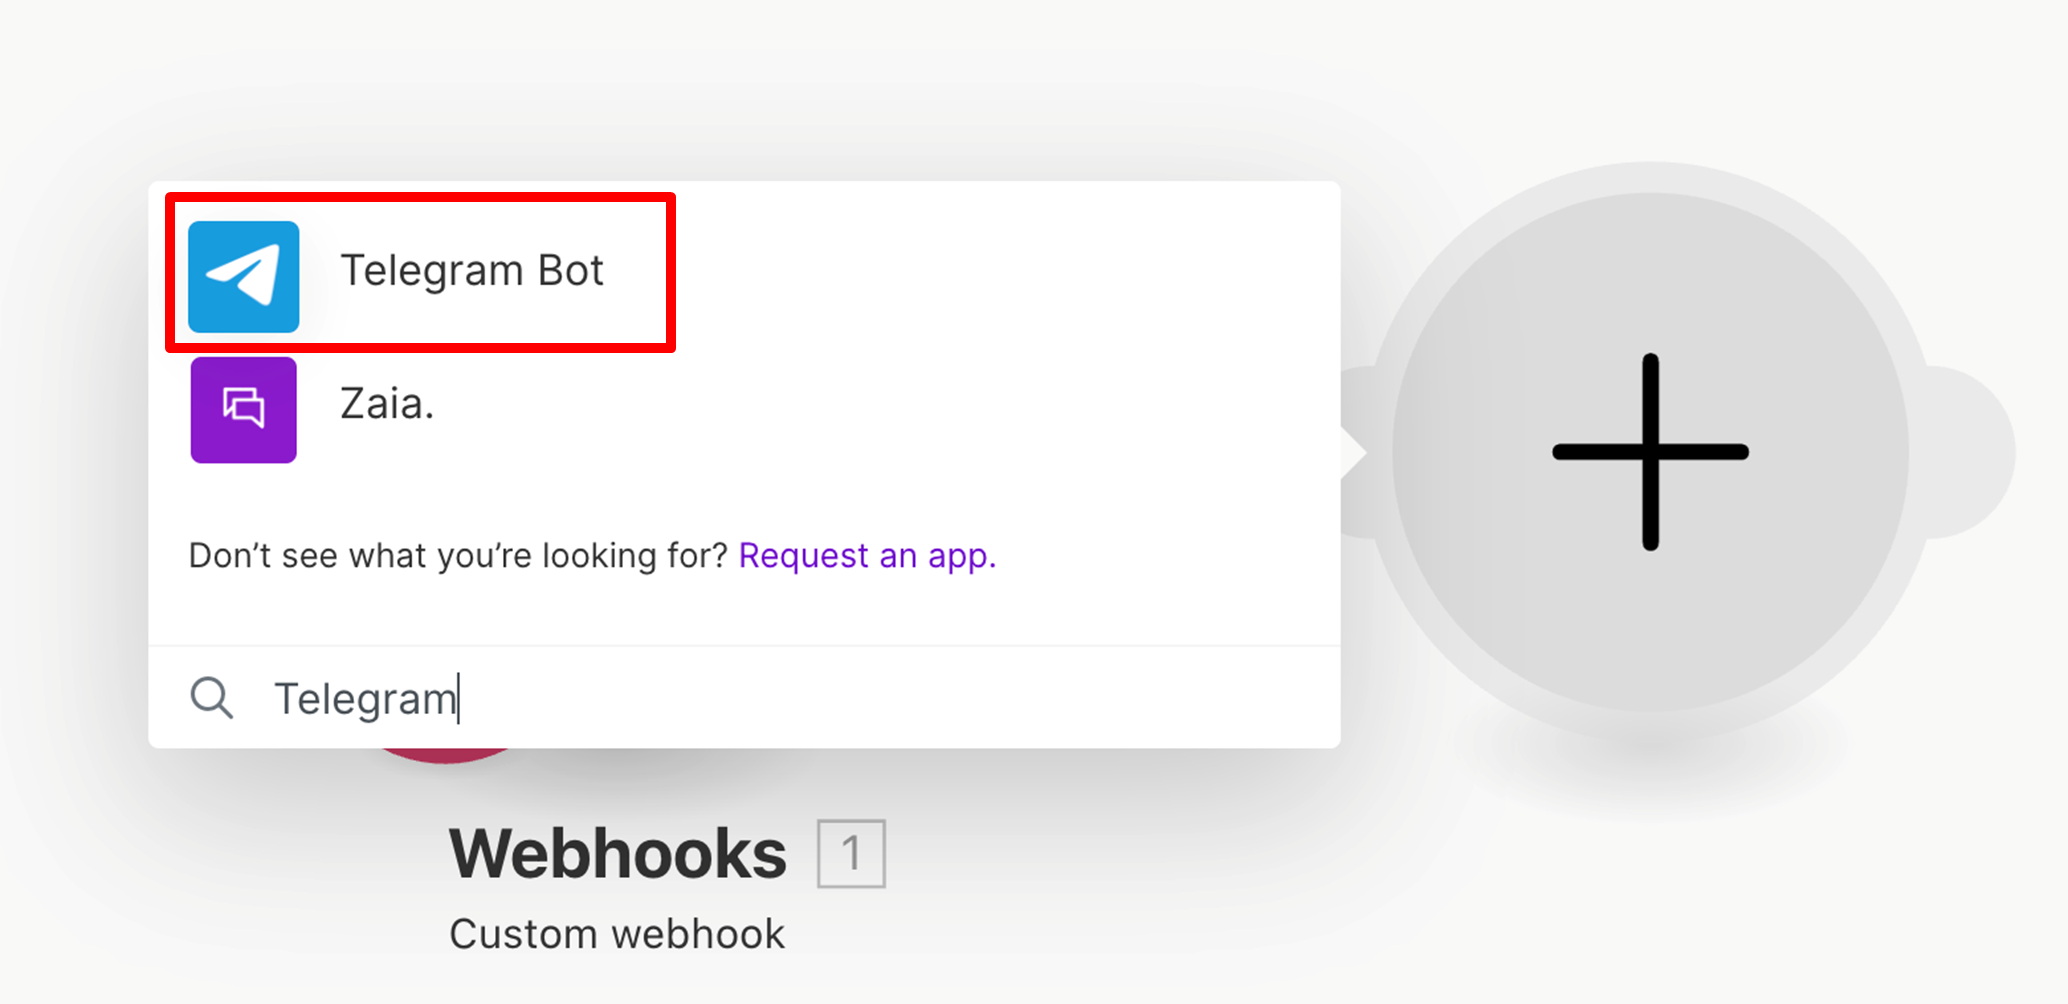
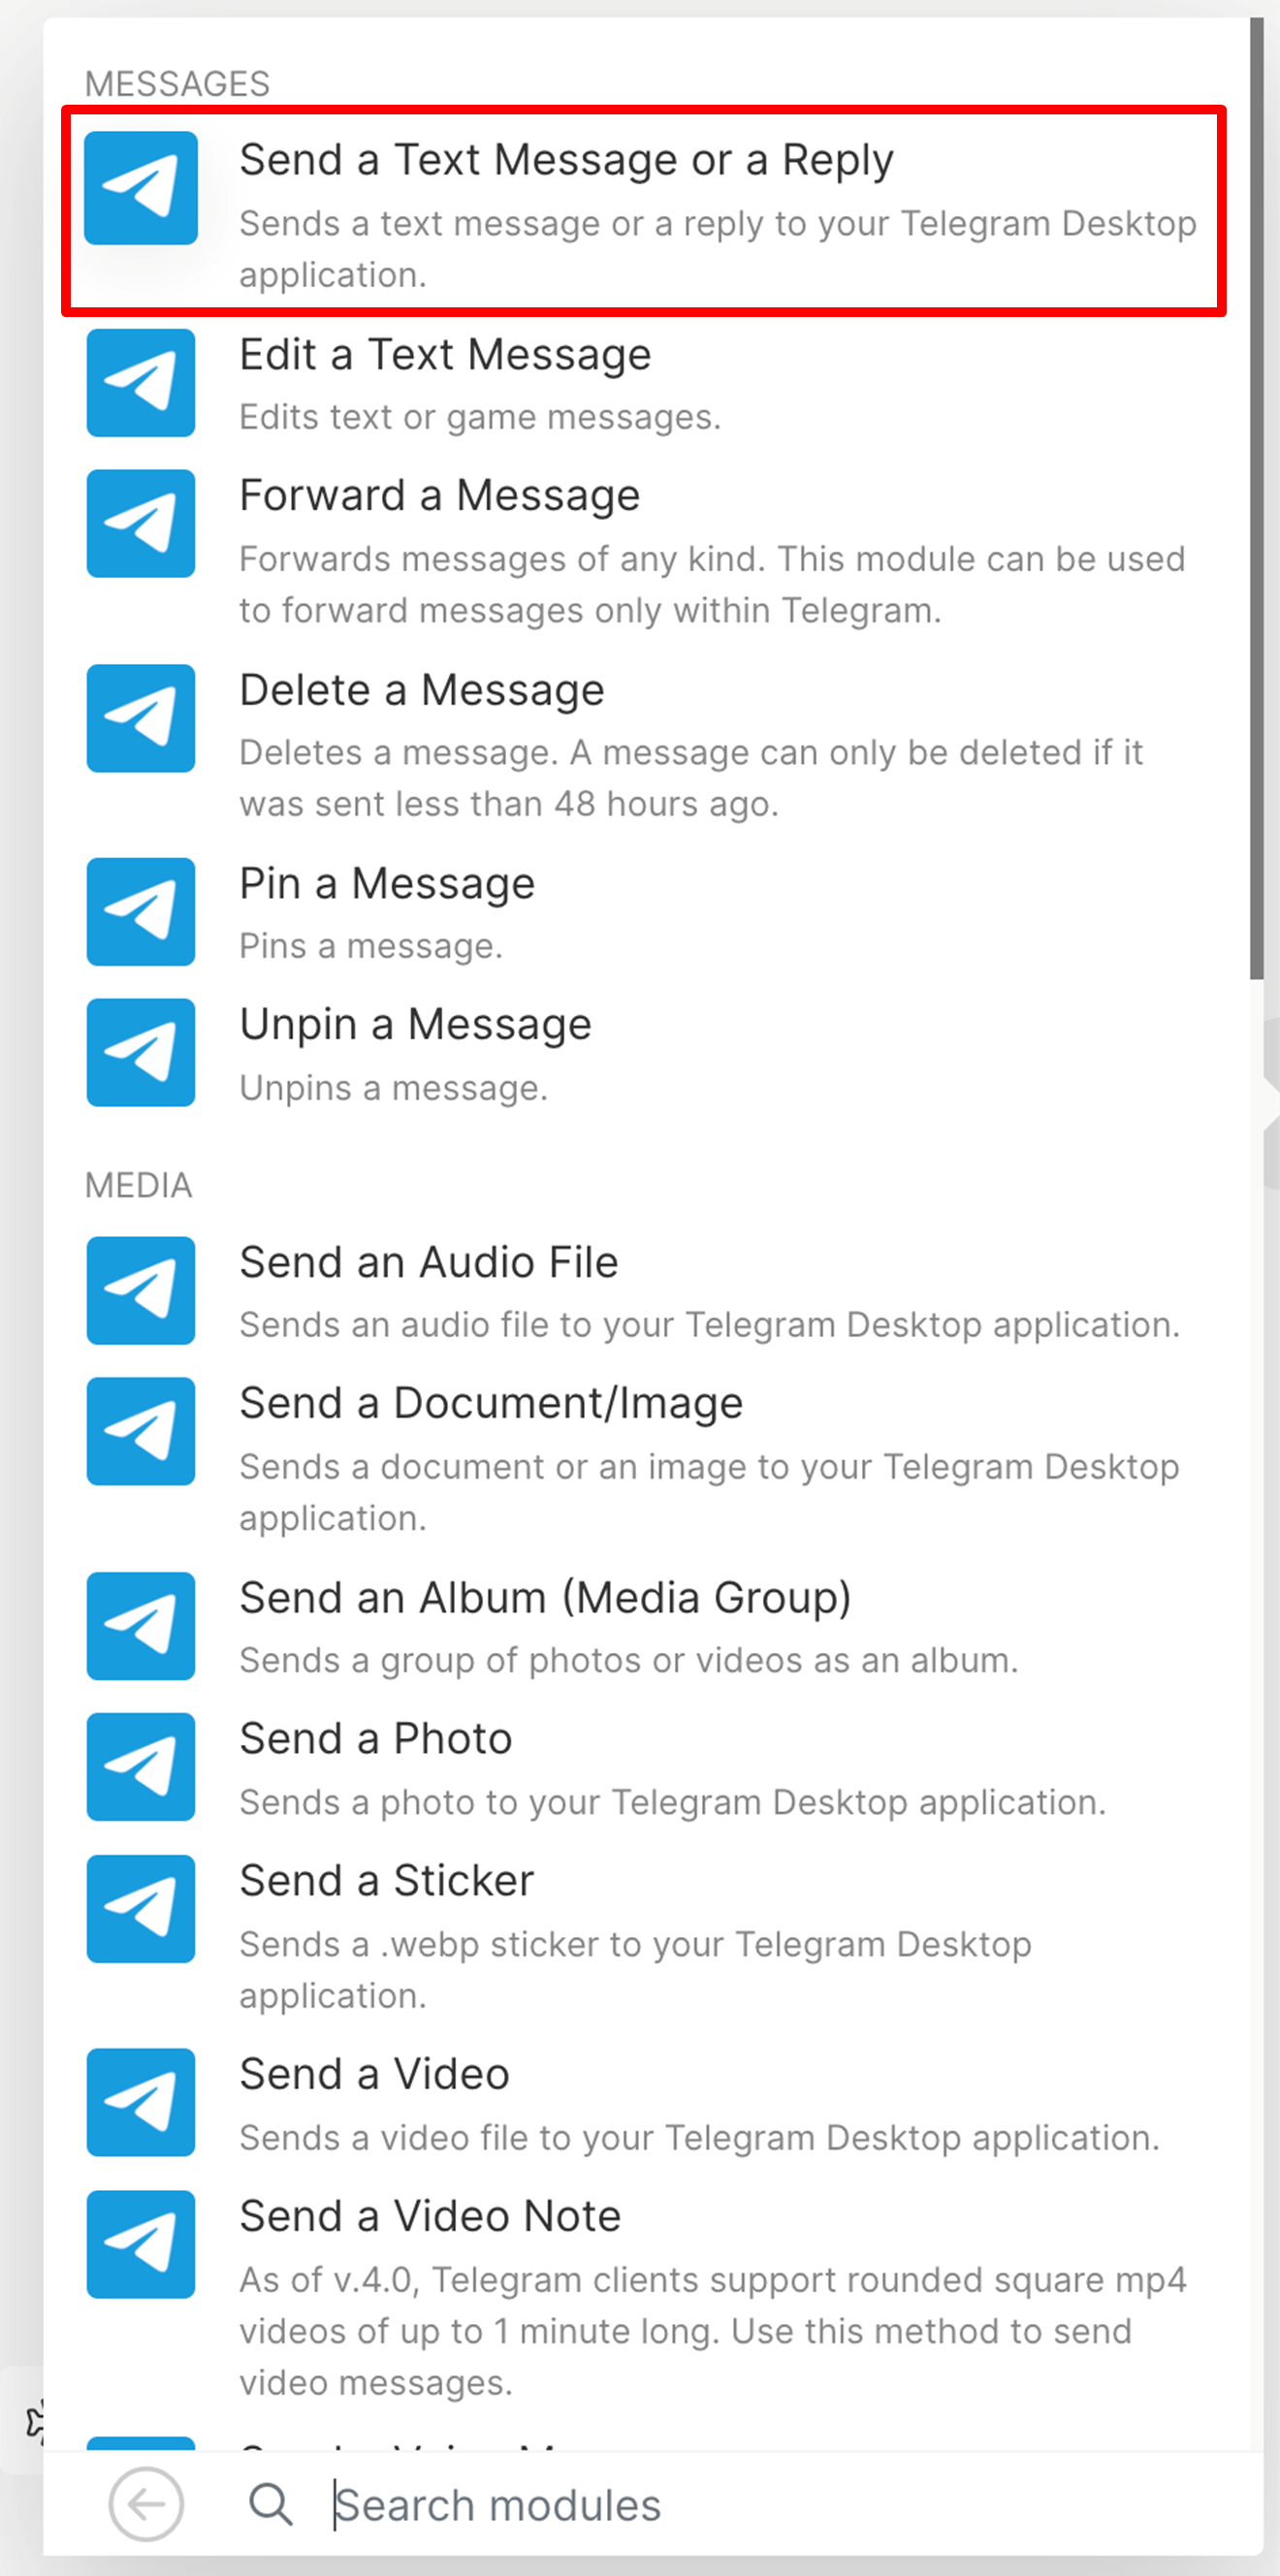
- Add a new Telegram Bot module
- Choose “Send a text message or a reply”
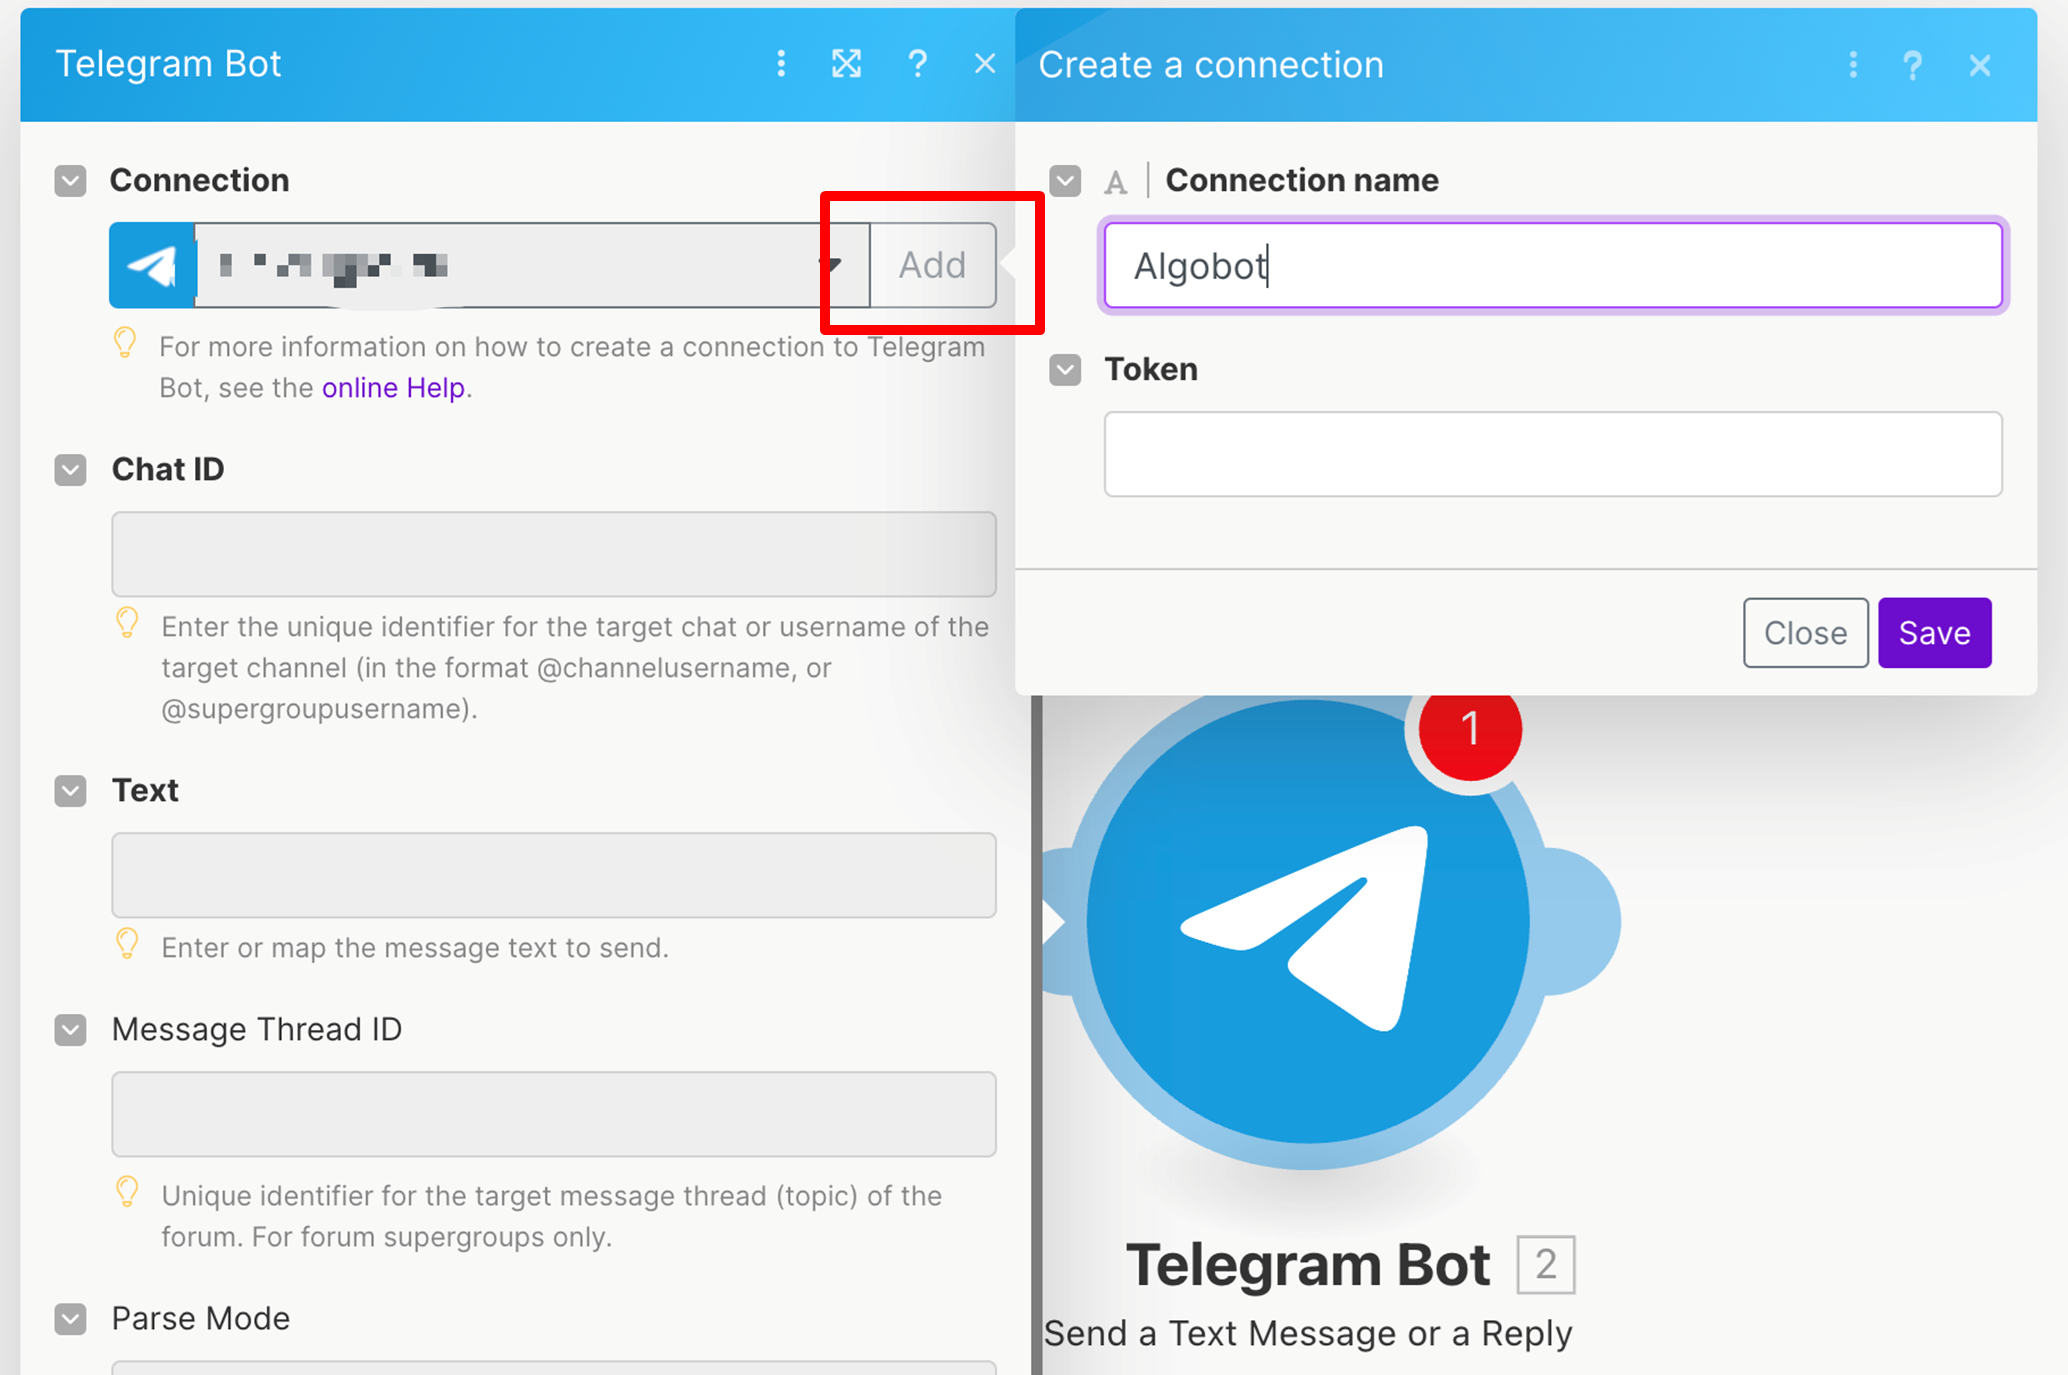
- First we need to add a new connection name, for example “Algobot”
- To get the private token we need to open Telegram on our computer or smartphone.
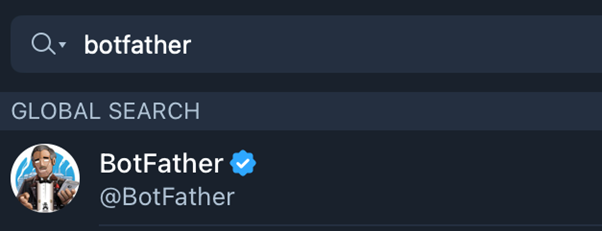
- In your Telegram app search for “Botfather” or click on https://telegram.me/BotFather

- To create a new bot type “/newbot” in the message box and press enter, then follow the procedure on the screen. PS: please give your bot a different name than displayed on the screenshot. All bots need unique names.
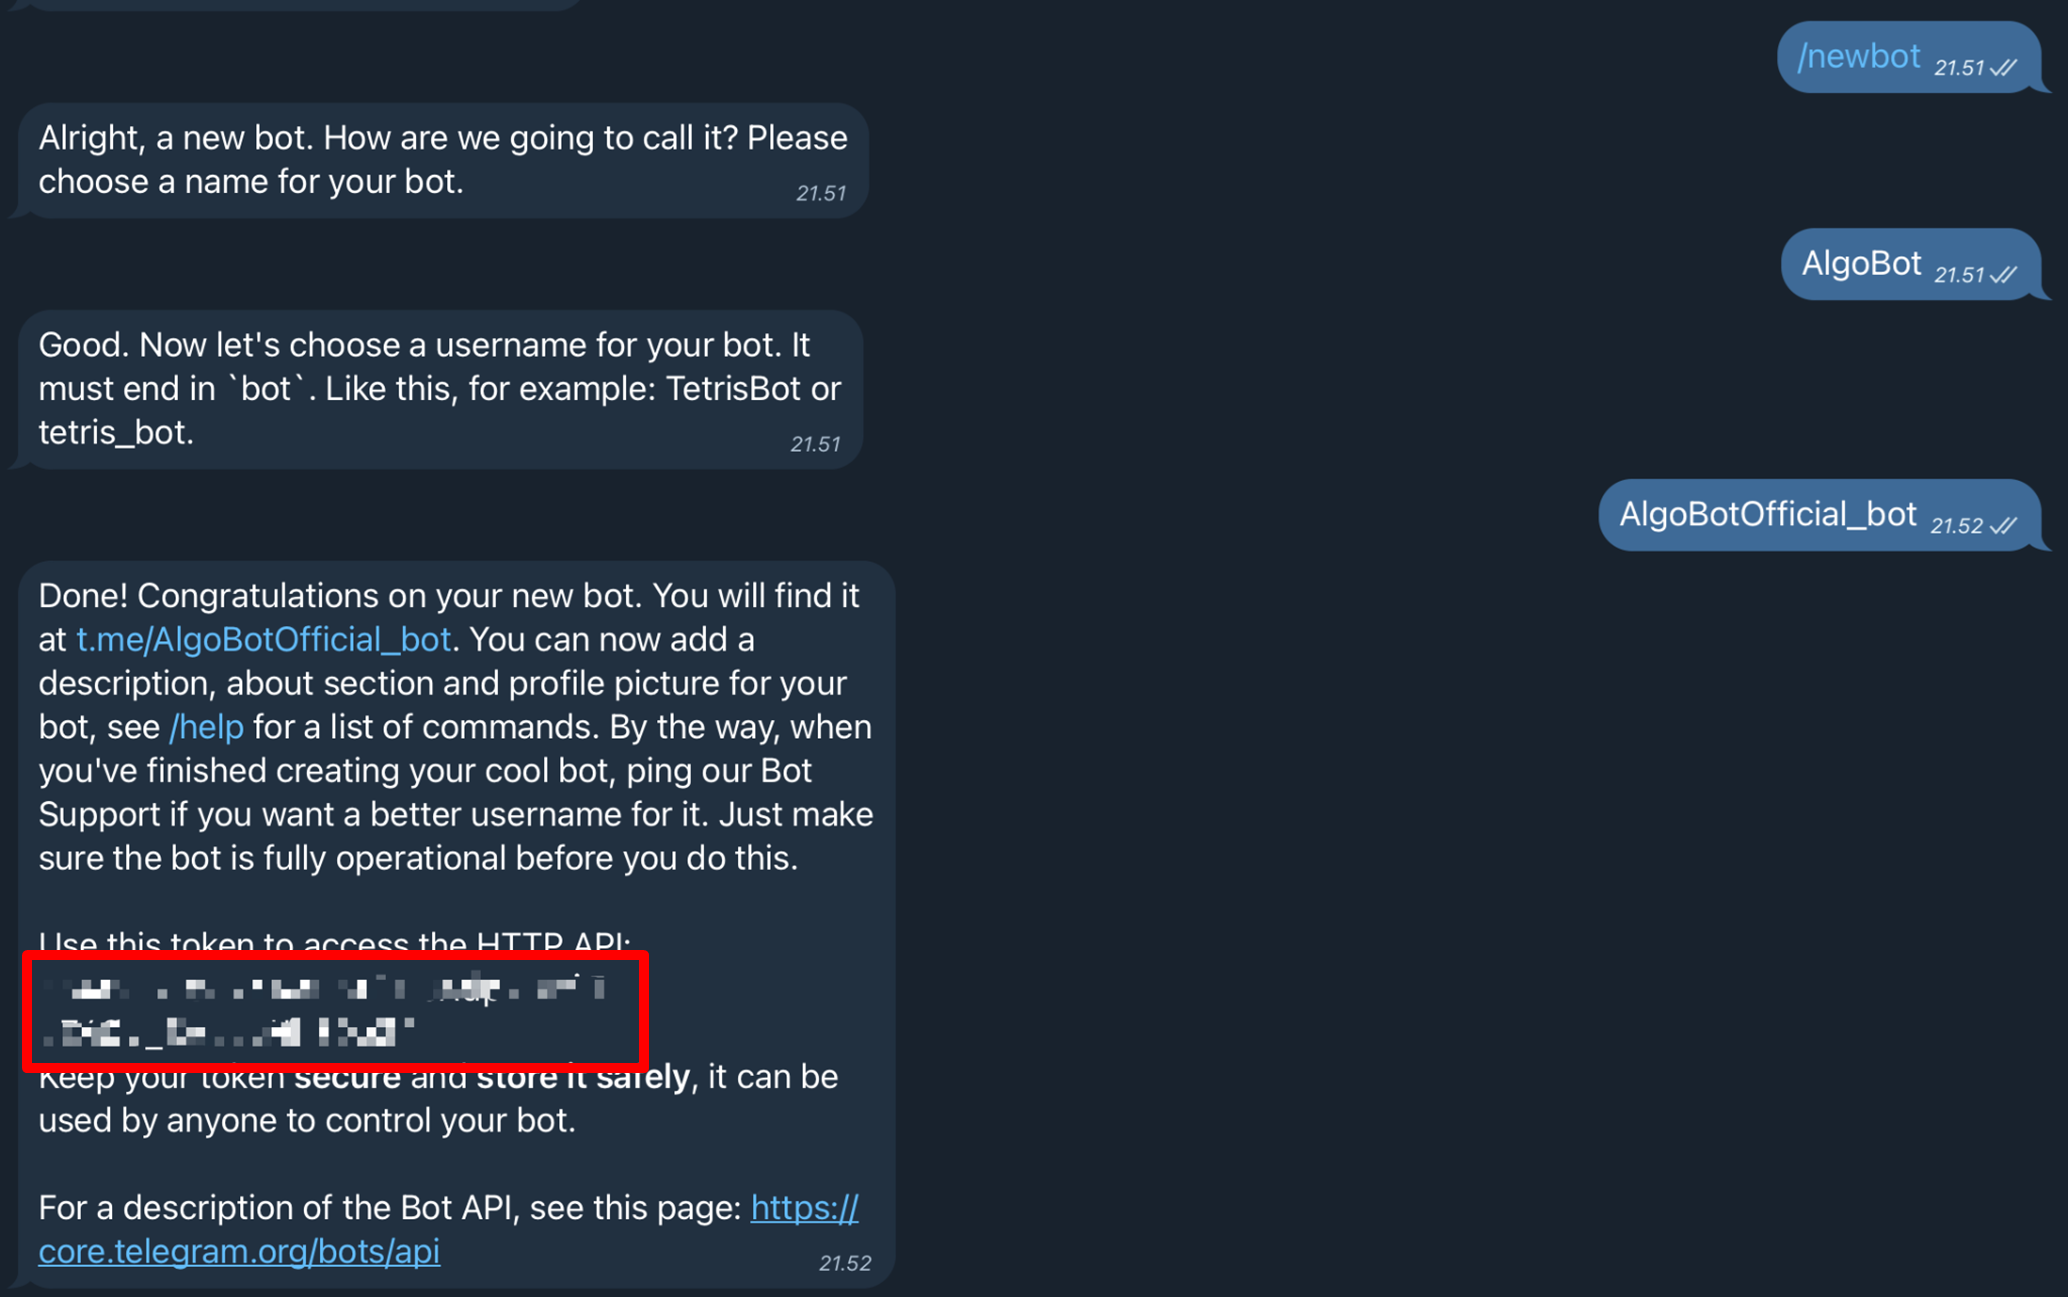
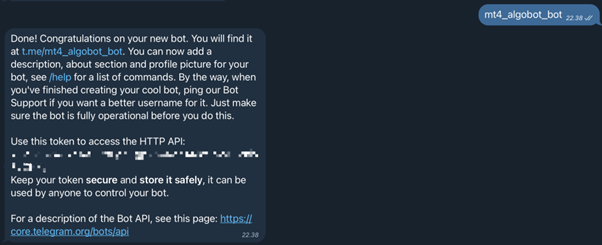
- You have received a message from BotFather containing the token, which you can use to connect the Telegram Bot to MAKE. Fill in the token in the correct field.

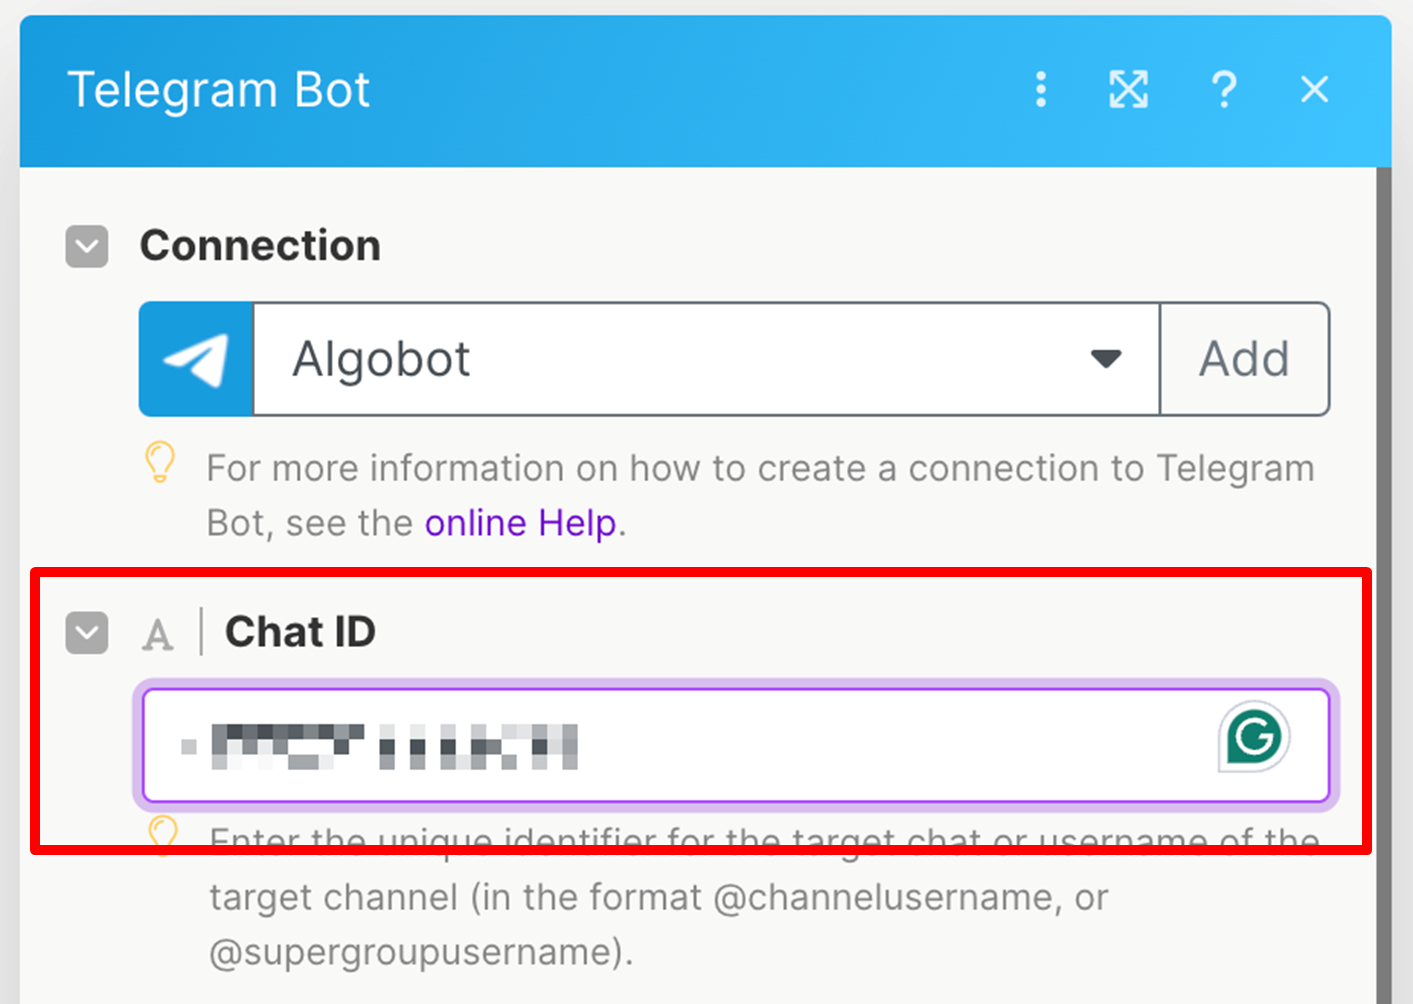
- Next we have to get the Chat ID from our newly created channel in order for the AlgoBotOffical_bot to send the signals to the correct channel.
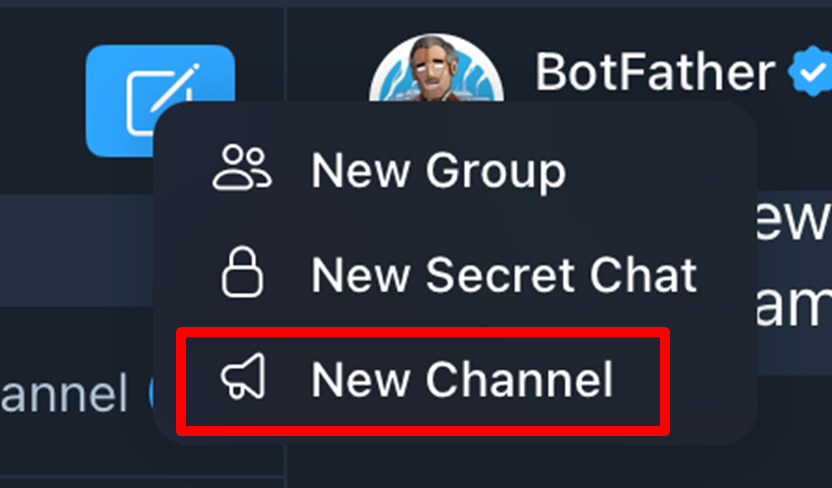
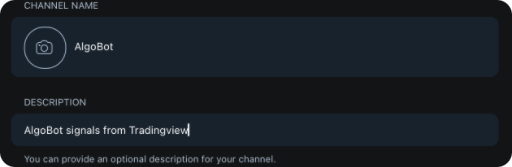
- Go to Telegram and create your new channel where you want the TradingView signals to be posted.
- Name it as you like, in this example we name it “AlgoBot”.
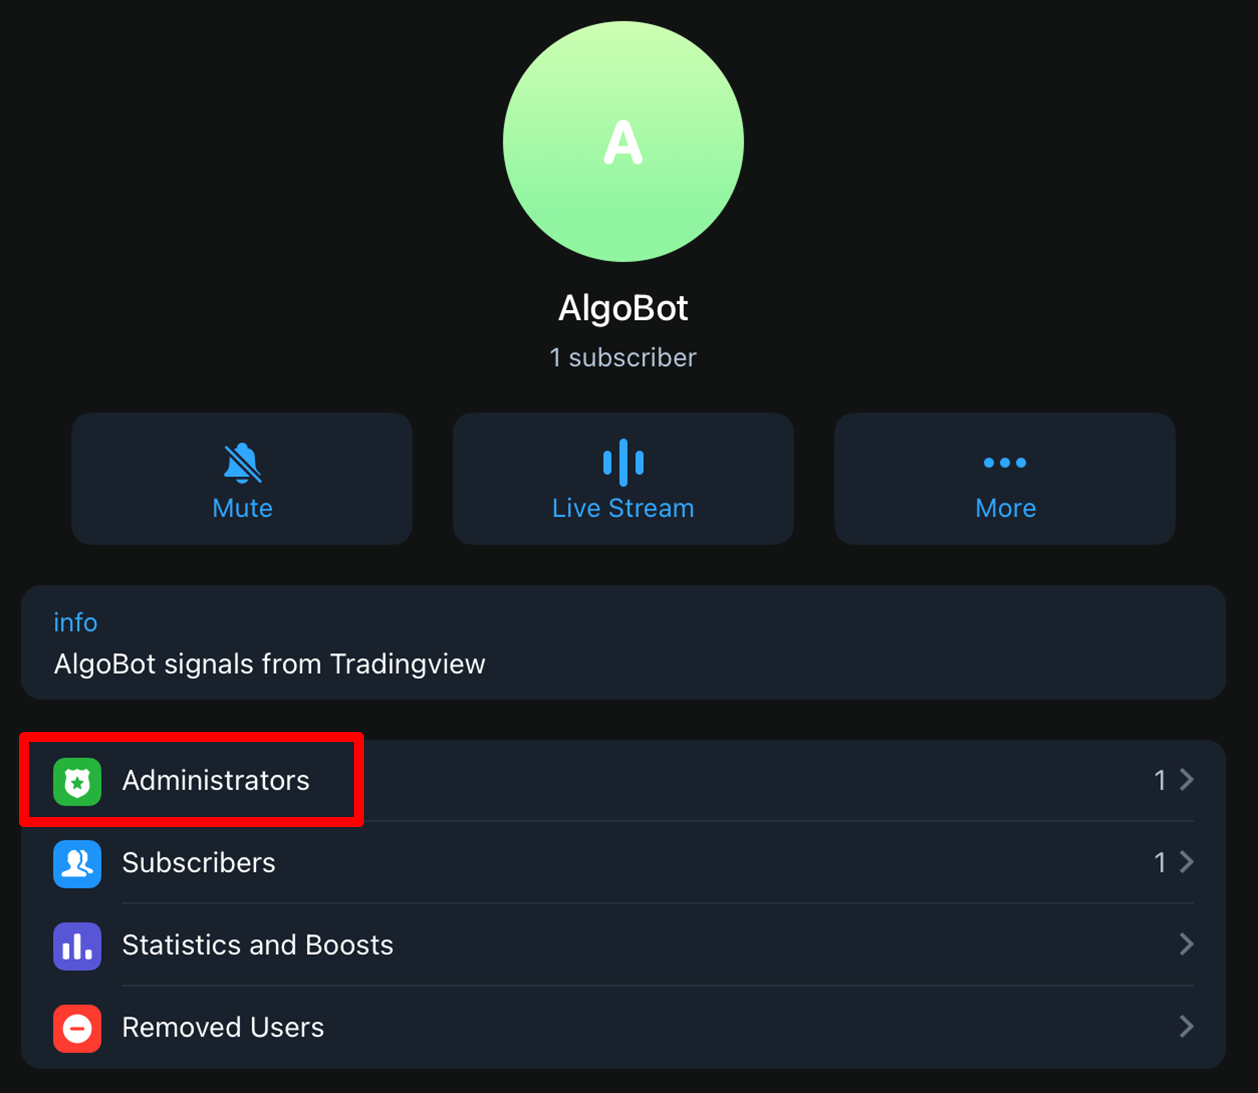
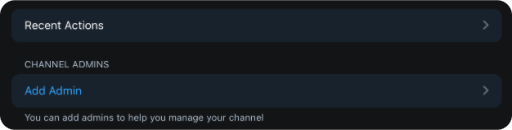
- When you go into the channel settings, click on “Administrators”
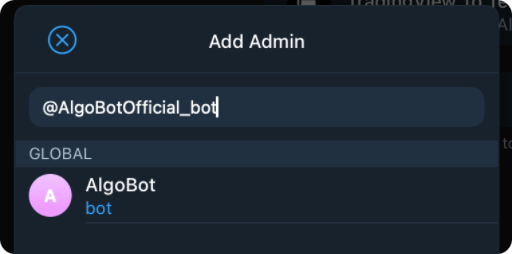
- Add your previous created bot (@AlgoBotOffical_bot) to your channel as an admin
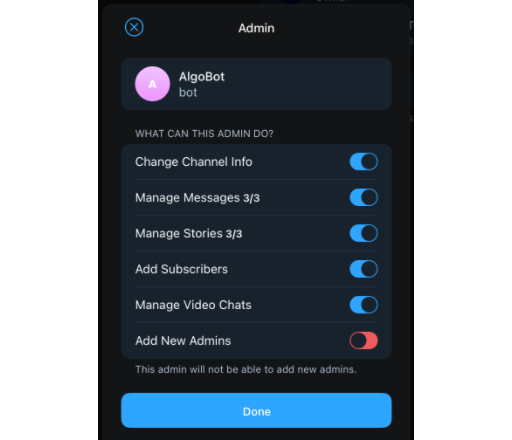
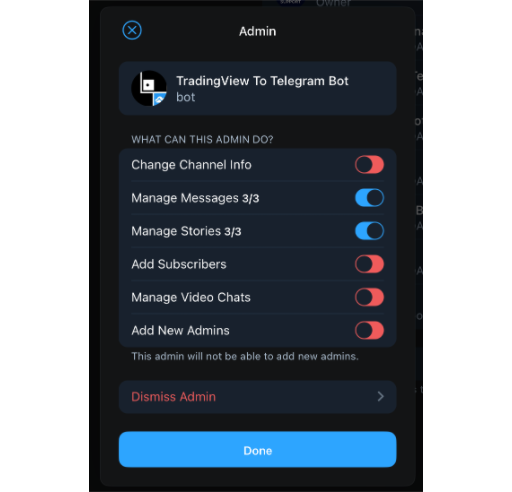
 Set permissions
- Click again on “Add Admin” and search “tradingview”
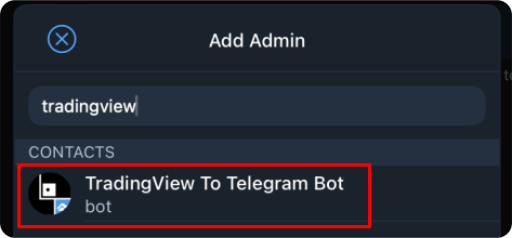
- Add the TradingView To Telegram Bot (https://t.me/tradingviewtobot) and click done
- Go back to your channel and type “/chatid”
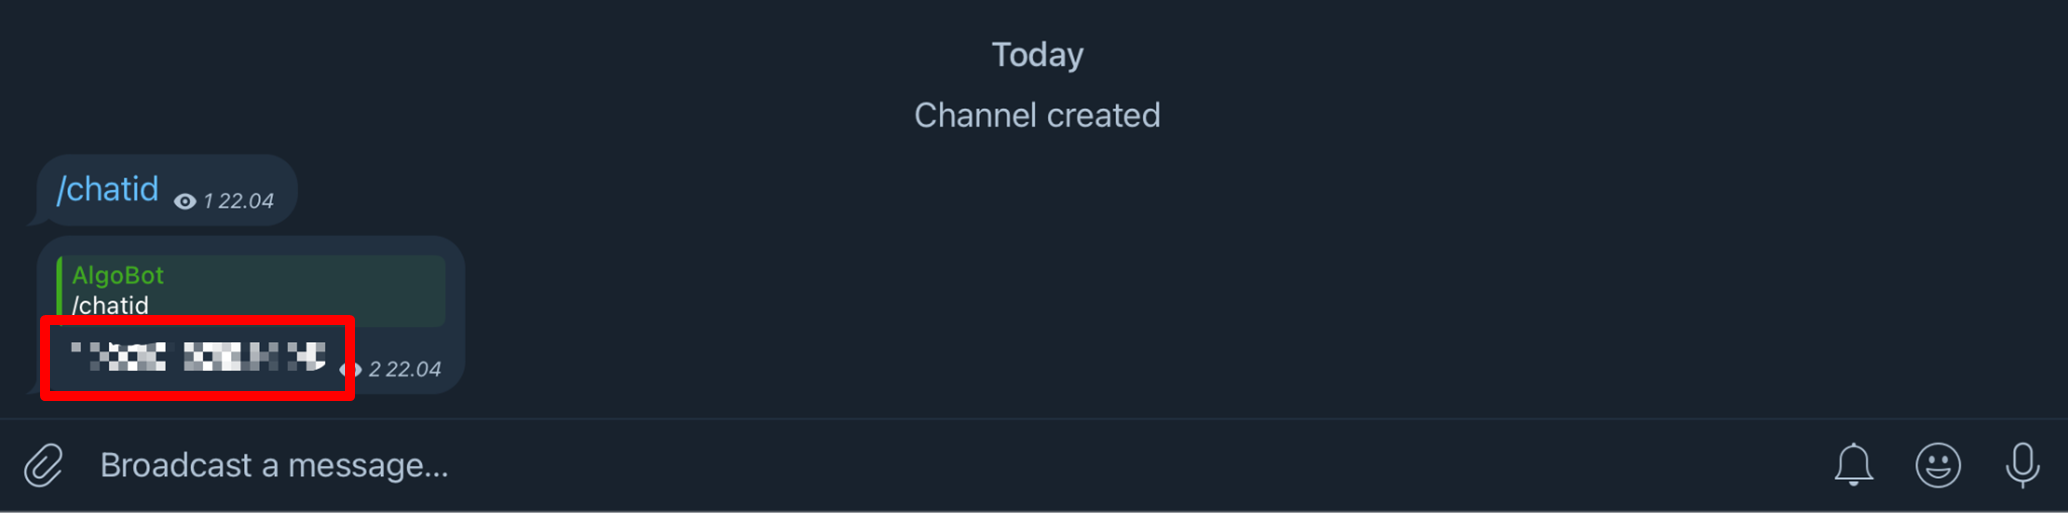
- The channel will give you a 13 number code back with the format “-100XXXXXXXXXX”
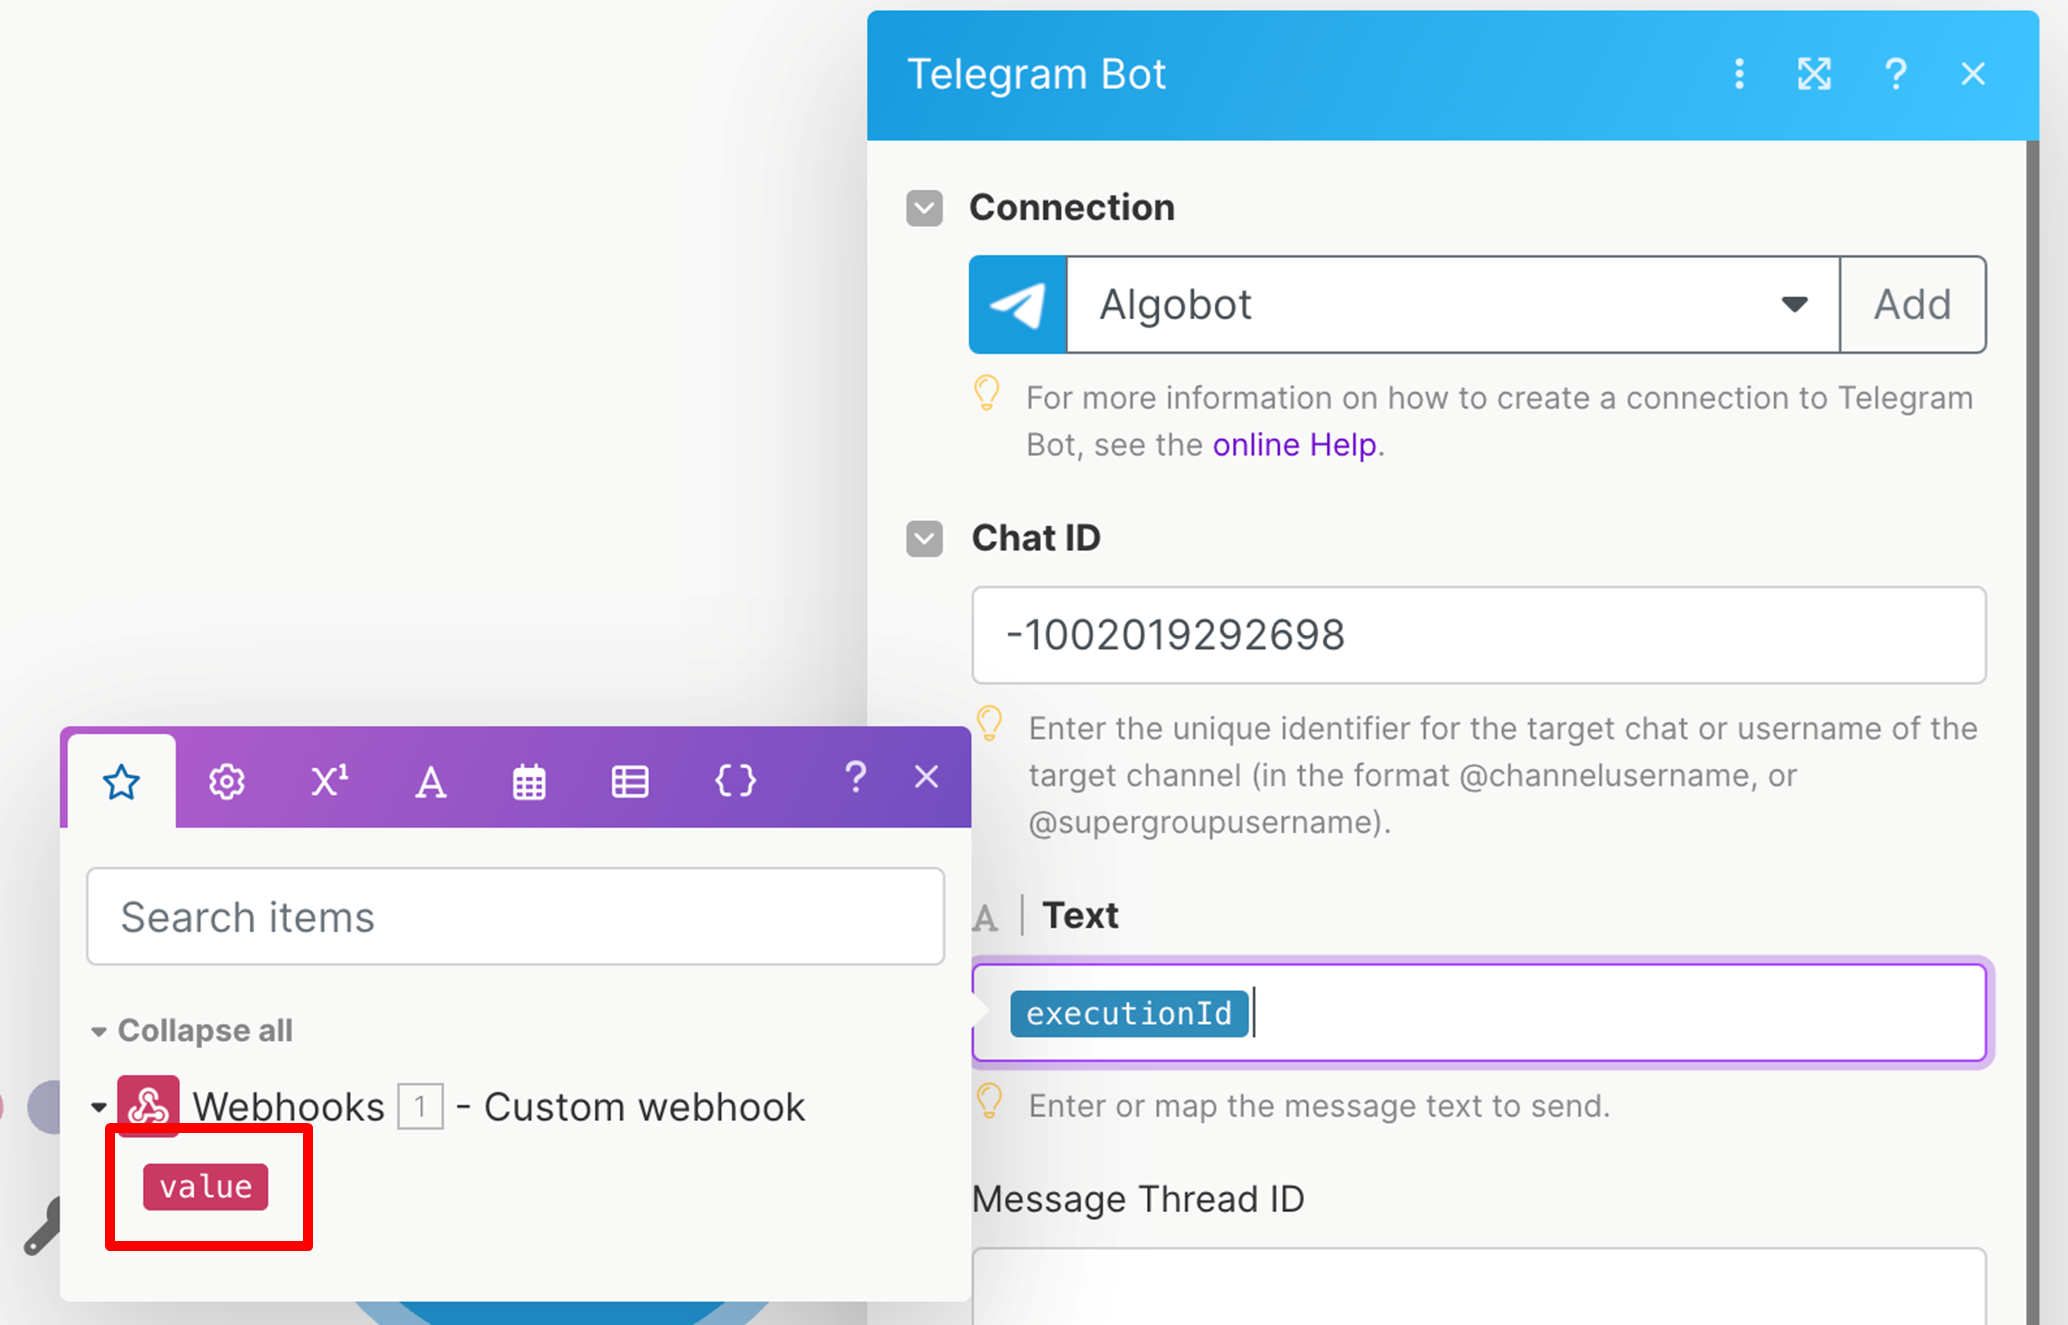
- Copy this code in your “Chat ID” field on the make website.
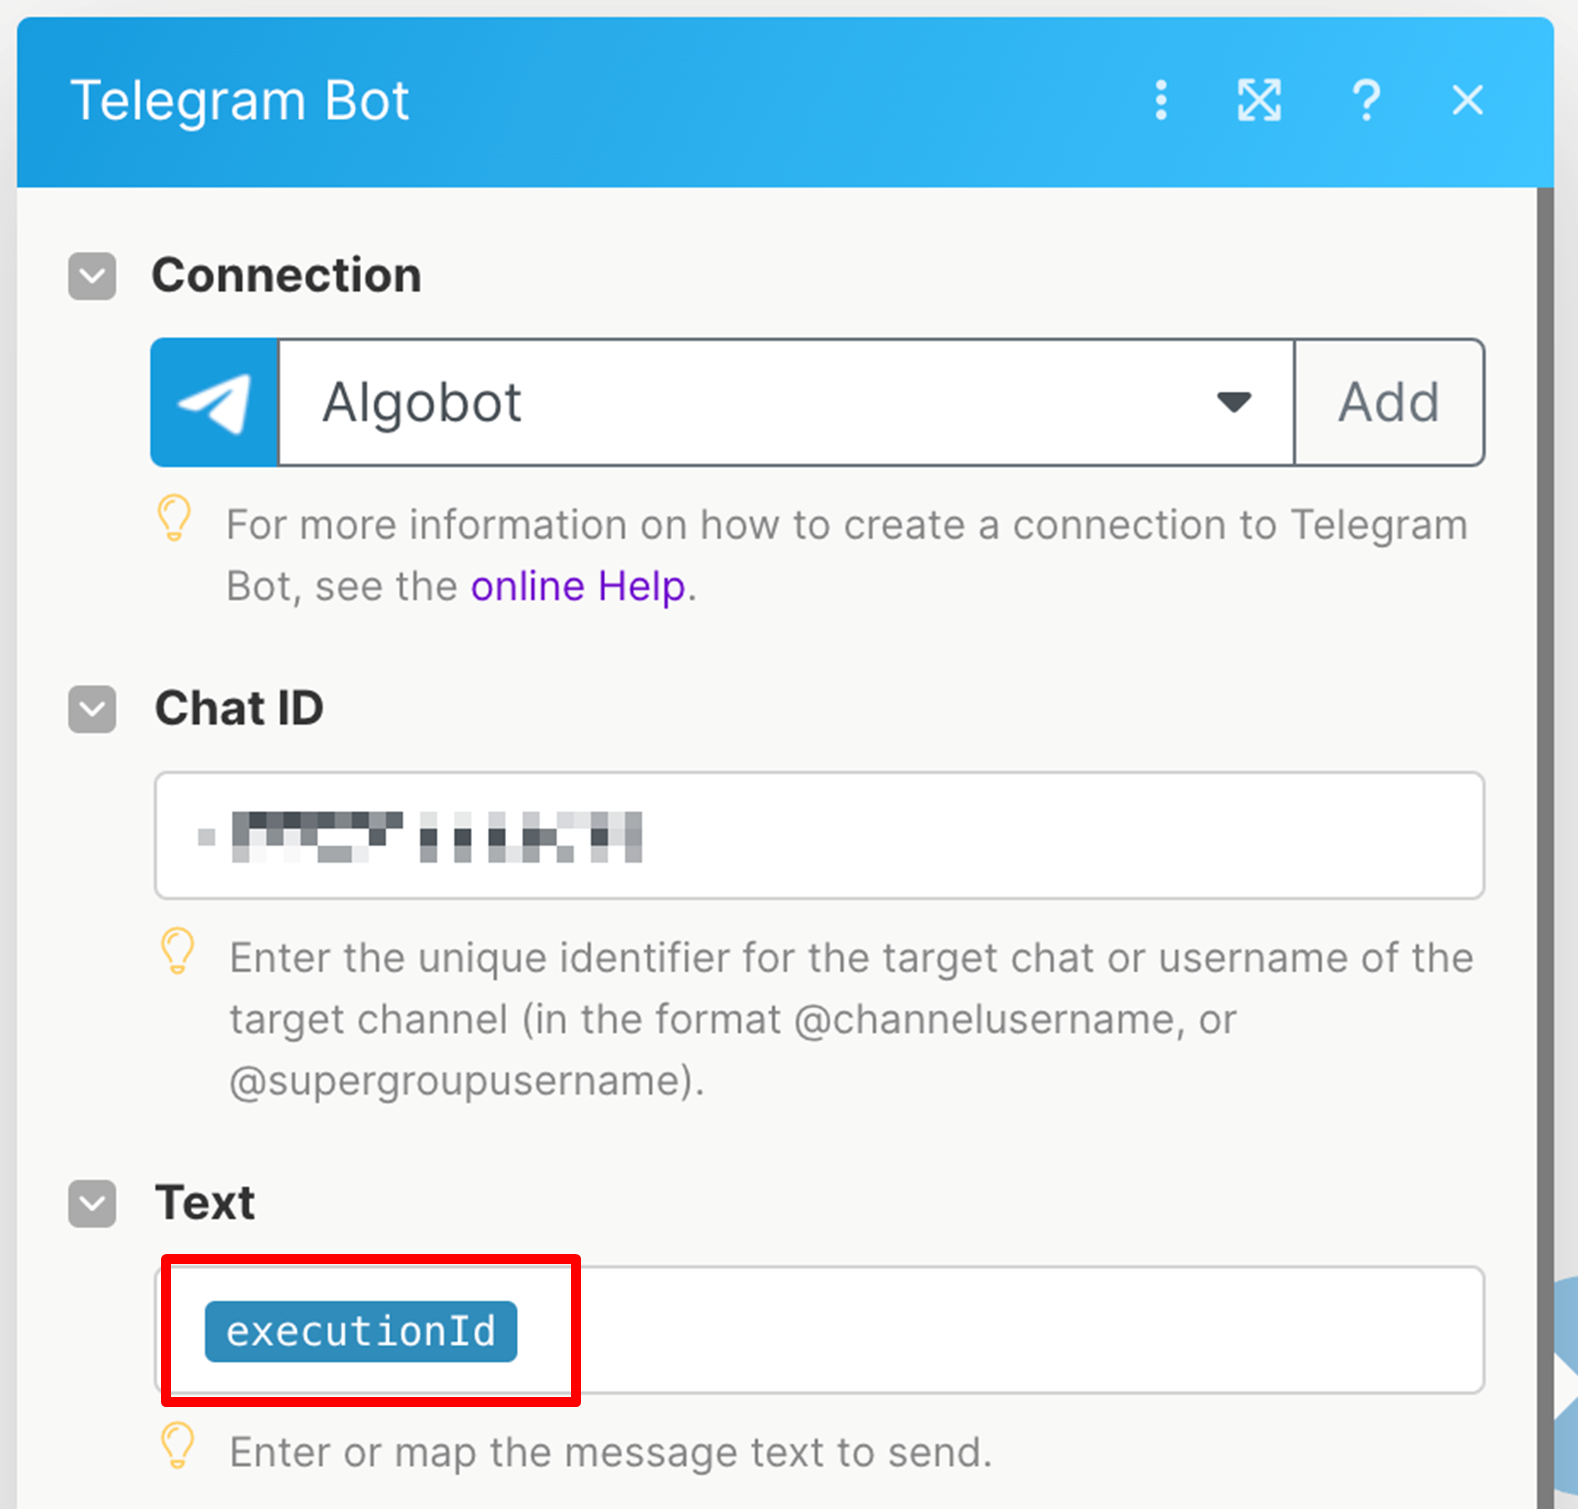
- The next procedure is to get the correct value for the “Text” field.
- In order to be able to close this Telegram Bot window, fill in the text field as below and choose “ExecutionID”, we will change this later when we have completed the test alert in Tradingview.
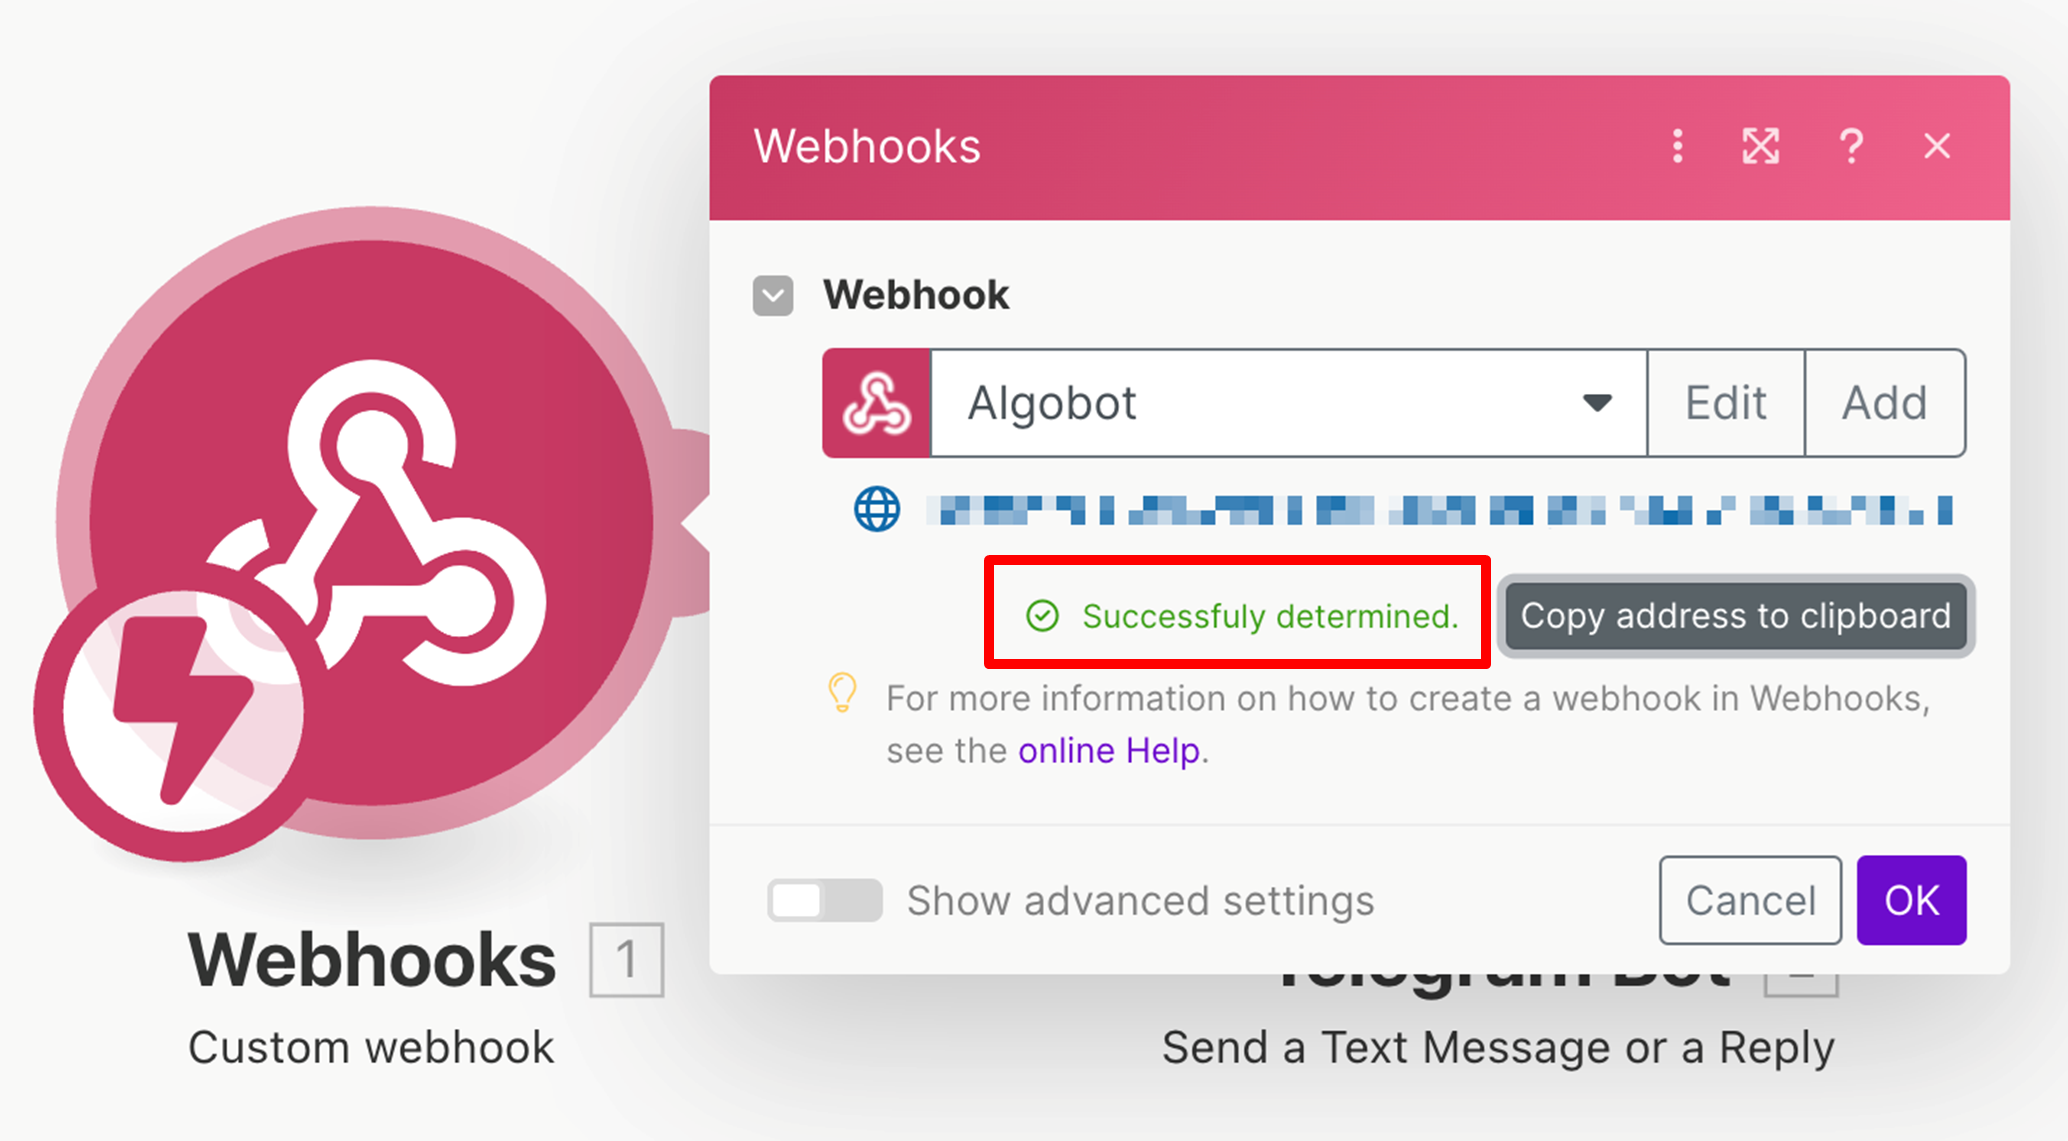
- Go back to your Webhook module in MAKE and click “Redetermine data structure”.

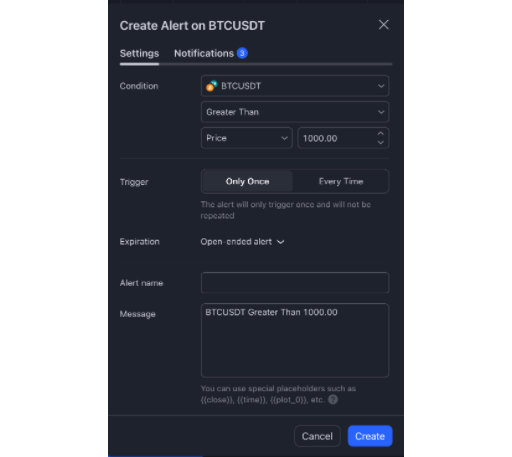
- In the meantime go to your Tradingview chart and create a test alert (for example a “Greater then” alert that will trigger immediately, for example BTC > 1000)
- Go to the notifications tab and paste the webhook address we created before.
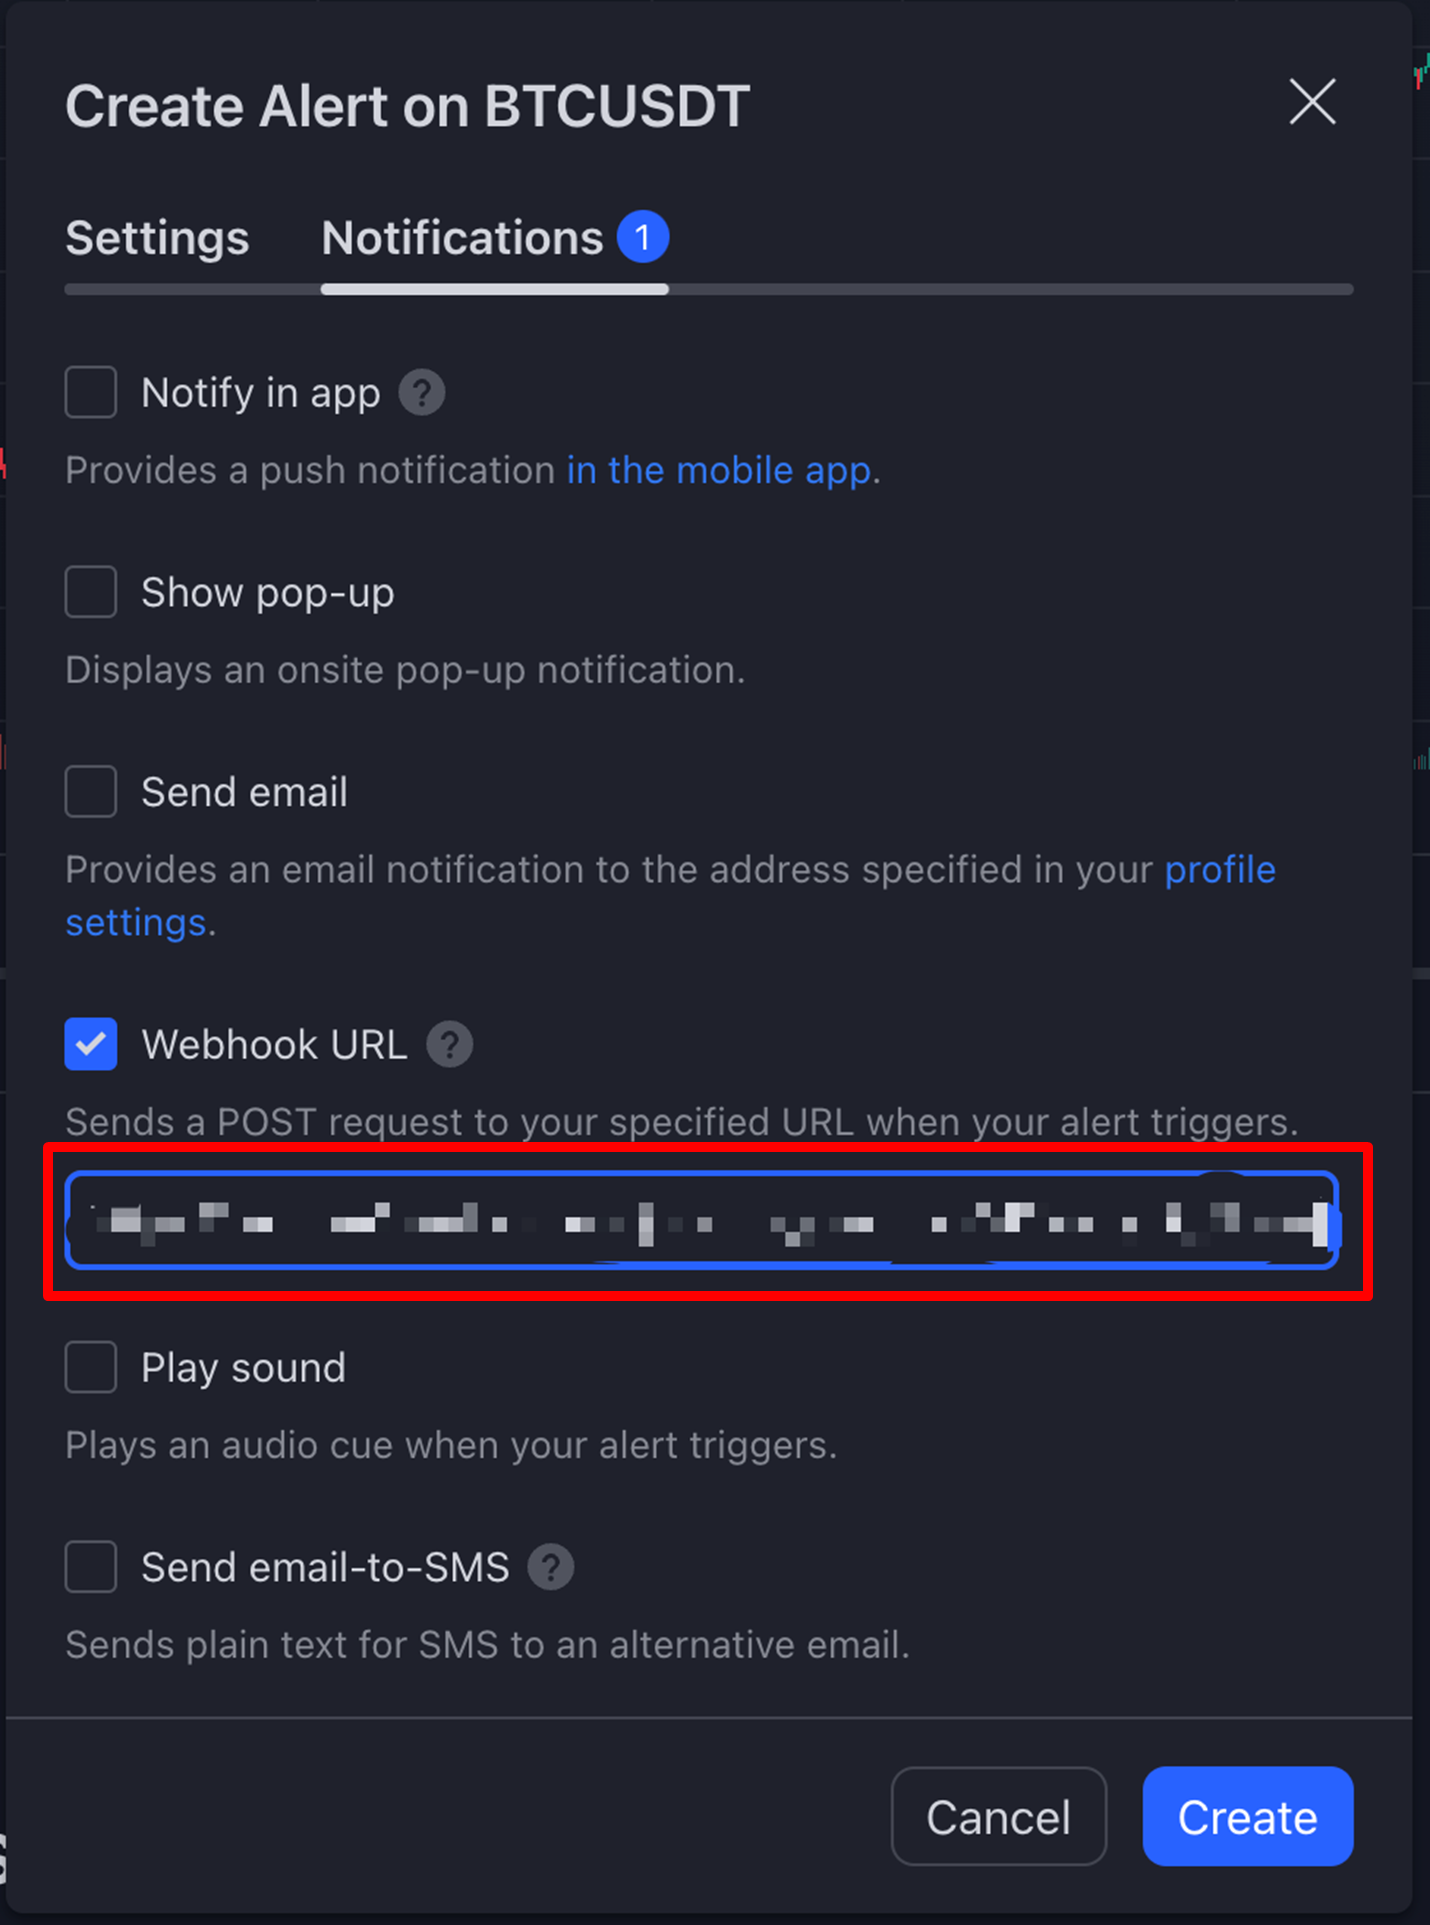
- Create the alert
- The alert should trigger immediately because the value you put in is true (BTC > 1000), then MAKE should detect the alert coming in displaying a SUCESS message.
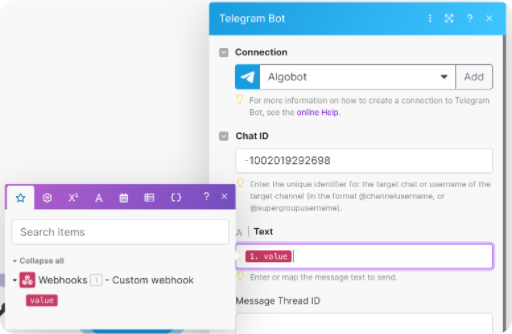
- Now navigate back to the Telegram module and find the “Text” field from 26). Remove the “Execution ID” and replace it by clicking on “Value”. This “Value” did not appear before since we hadn’t trigger the alert yet. Now it does appear and we can use it.
- Don’t forget to save the scenario and turn it on after you saved it so it’s ready to receive incoming alerts.
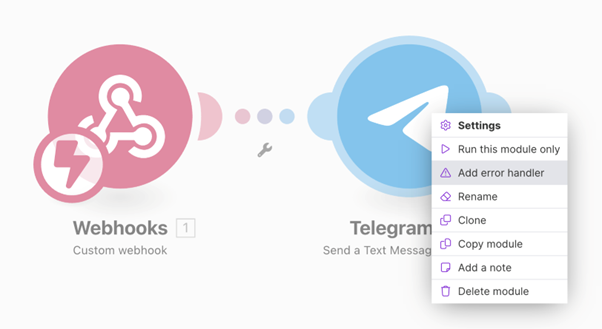
- When the webhook module and Telegram module are set up, don’t forget to add the error handler. It will reduce problems and errors because Tradingview sometimes sends an empty payload to the webhook at the moment of creation, and the error handler prevents the scenario from stopping in that case. Right click the Telegram module and add error handler.
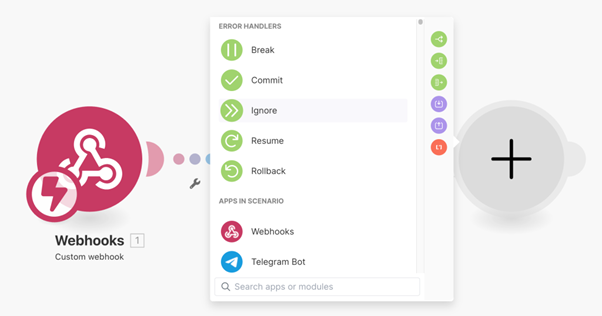
- Select the “ignore” option.
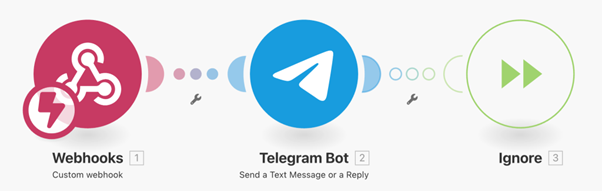
- Only now we are sure the connection between our Tradingview signals and our Telegram channel works because we set up MAKE in a correct way.
Forex: Tradingview To Anywhere
For autotrading forex signals we have different options. Please keep in mind that all options require one or more third party service(s) to be purchased separately.
There are programs that can read Tradingview alerts directly using their own predefined syntax like https://tradingview.to/ For the syntax please see here https://tradingview.to/mt4
Go to https://tradingview.to/anywhere and select MT4 or MT5 (depending on which version you use). Then press CONNECT.
MT4:

MT5:

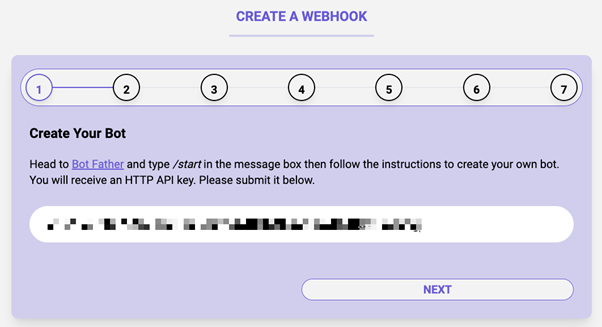
When we start the setup guide we need to create a bot through botfather first.
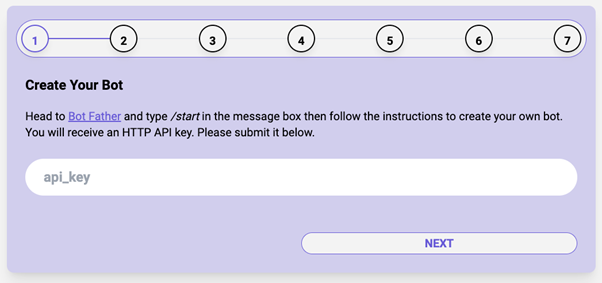
Search botfather on Telegram.
And create a new bot.
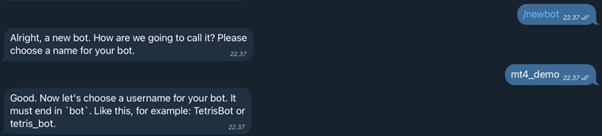
Give it a name and copy the API KEY.
Paste the key here.
The next step is to create a Telegram channel in order to receive the alerts.
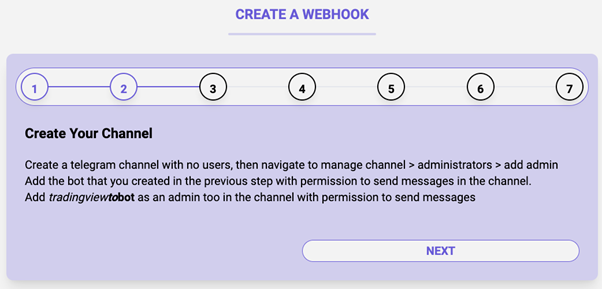
Set the necessary permissions.
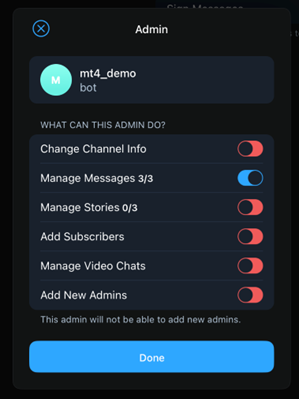
Add the necessary admins.
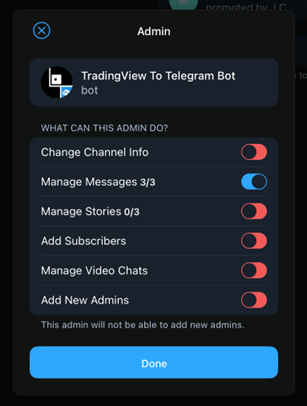
Your channel should have the following members, the bot you created with botfather and the Tradingview to Telegram bot.

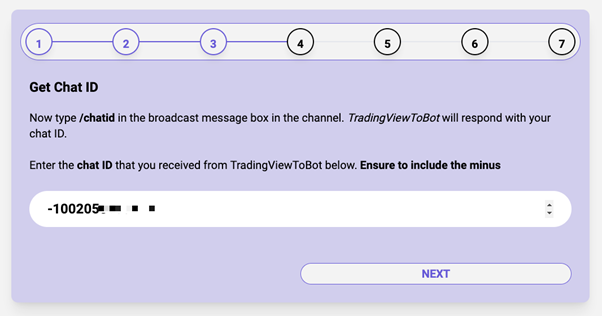
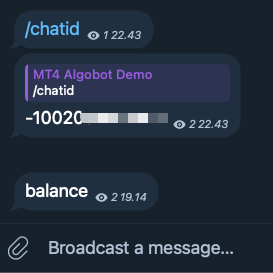
Next we need the chatid from our Telegram chat. Type “/chatid” in the Telegram channel you just created and paste the code in the following window (don’t forget to include the minus).

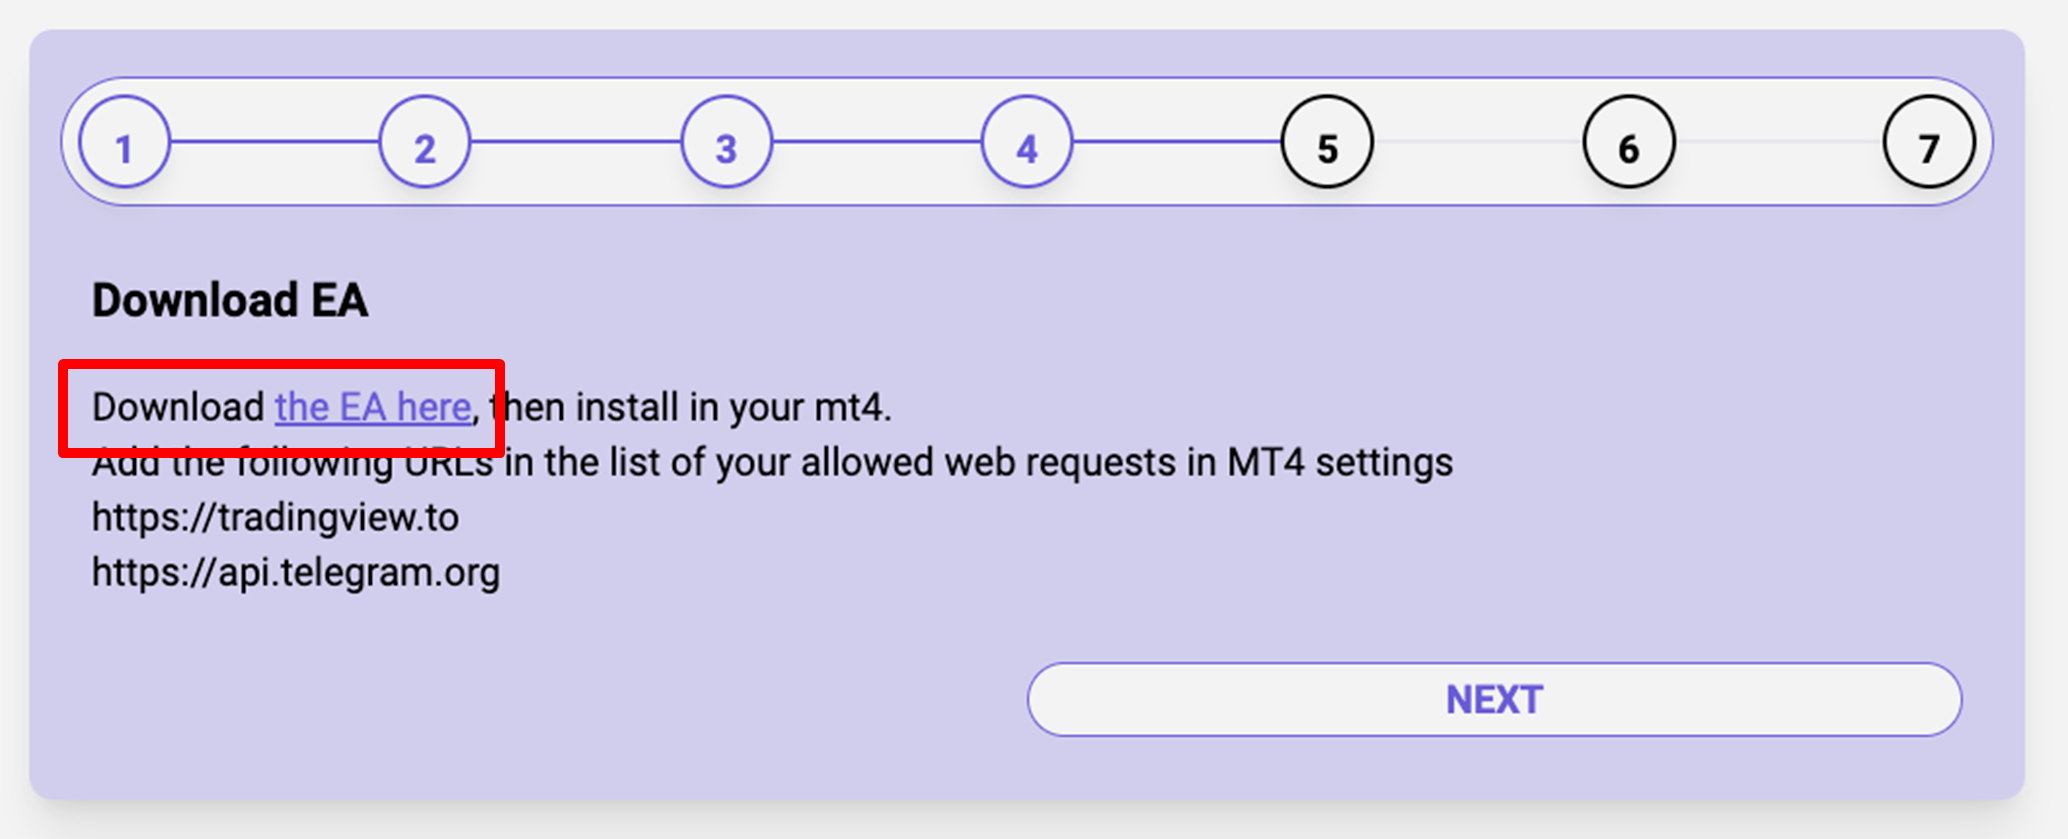
Now we need to set up MT4/MT5 to get the alerts from Tradingview to MT4/MT5. Download the expert advisor from their Google drive.
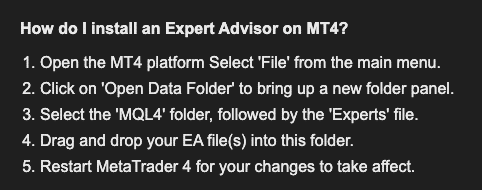
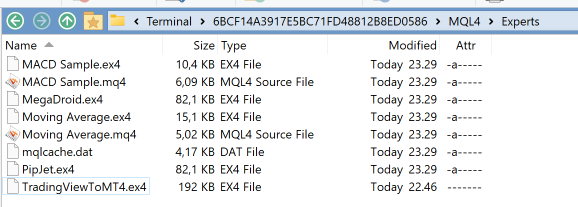
When downloaded from the Google Drive paste the UNZIPPED file (.ex4 extension) into the appropriate folder.
MT4 (.ex4):
MT5 (.ex5):
After pasting the file into the correct folder restart MT4/MT5 and go to the expert advisors window.
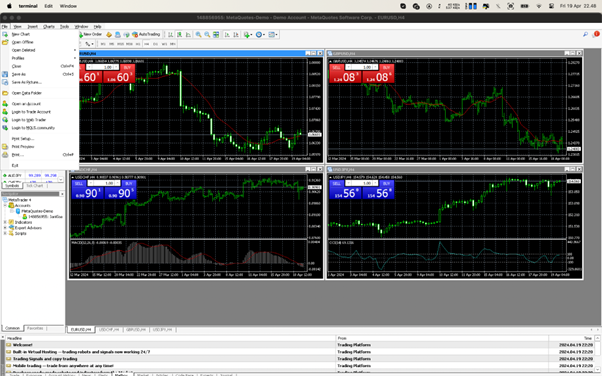

You can see that the EA is now listed in the list of Expert Advisors.
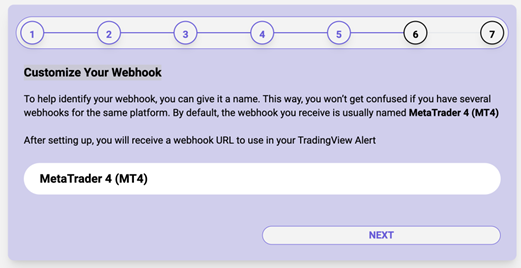
We can give our webhook a custom name or go with the default.
MT4:
MT5:

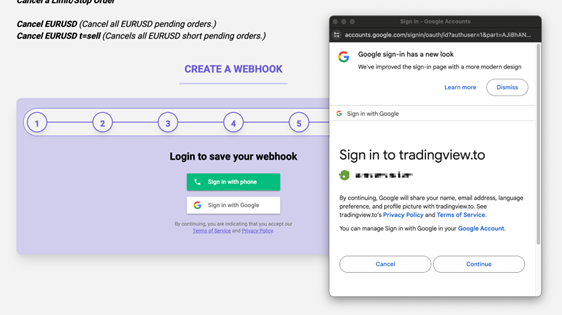
Log in to save your webhook.
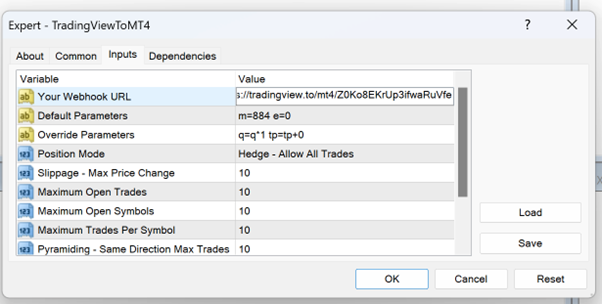
Then double click the TradingViewToMT4 expert advisor to add it to the chart and paste your webhook URL in the appropriate field. Press OK when done.
After this we can test to see if our webhook connection works properly.
Press the “send a test” button and the word “balance” should appear in your TG channel immediately after pressing.
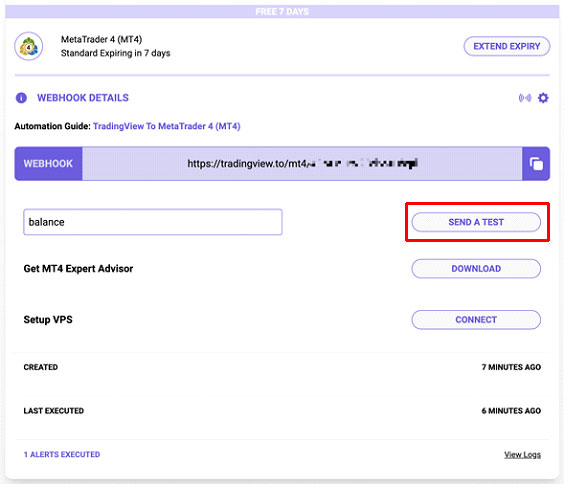
Success!
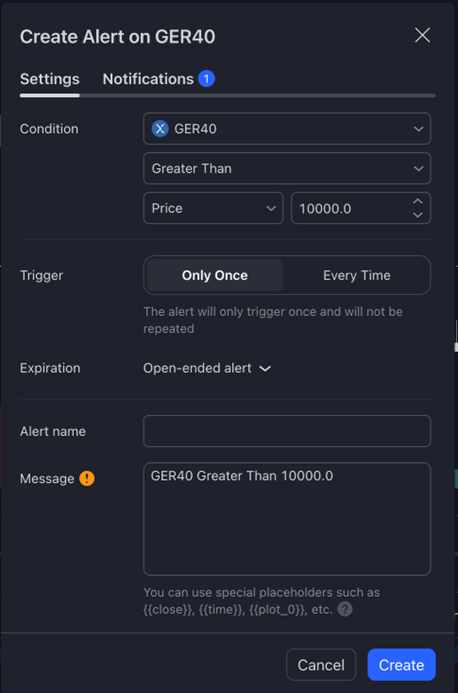
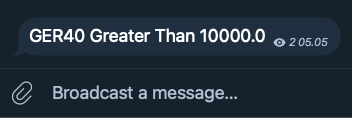
Now we can create an alert on Tradingview and see if it reached our Telegram channel correctly. Let’s create a quick test alert first. Login to your Tradingview account and open the chart of the forex pair you want to trade. We will first take the GER40 1 second chart.

Create a “greather then” alert first to check if it’s sent correctly to Telegram.
Fill in the webhook you created in TradingViewtoAnywhere.
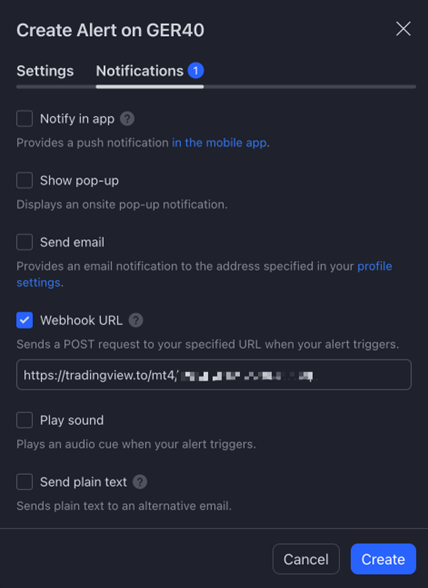
A moment later we can see the message is received in our TG channel
Now that this connection works we can show a syntax example in order to open the trades properly in MT4/MT5. Change the time frame to your desired setting (in this example we will take 1h TF), add the latest Algobot indicator to the chart and create your desired setup.
WARNING: The alert syntax has to reflect the Algobot setup completely in order to have the exact results, If you fail to do so the trades on the chart and the trades send to MT4/MT5 will be different.
In this example we have the following take-profits set up in Algobot.
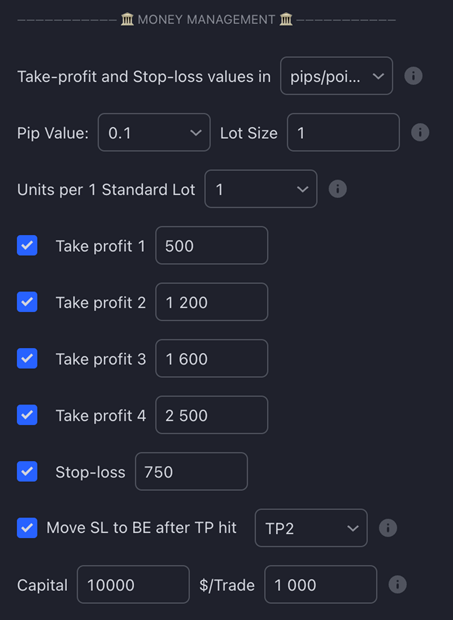
So the alert message consists of the following parts :
- 4TPs used (500, 1200, 1600, 2500 points which for this broker translates to 50, 120, 160, 250 index points)
ATTENTION: Different brokers have different decimals and at one broker it could be 50 but at the other broker 500. Be sure to check this before you send the alerts!! - we open four trades 0.02 lot each (one trade for each TP)
- we move SL to BE after price reaches 1200 points (TP2) and lock in 100 points profits (to cover broker costs and small profits)
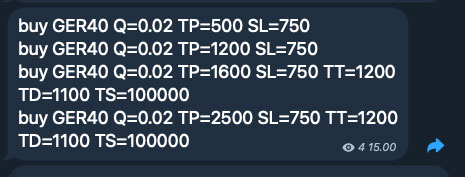
BUY:
buy GER40 Q=0.02 TP=500 SL=750
buy GER40 Q=0.02 TP=1200 SL=750
buy GER40 Q=0.02 TP=1600 SL=750 TT=1200 TD=1100 TS=100000
buy GER40 Q=0.02 TP=2500 SL=750 TT=1200 TD=1100 TS=100000
SELL:
sell GER40 Q=0.02 TP=500 SL=750
sell GER40 Q=0.02 TP=1200 SL=750
sell GER40 Q=0.02 TP=1600 SL=750 TT=1200 TD=1100 TS=100000
sell GER40 Q=0.02 TP=2500 SL=750 TT=1200 TD=1100 TS=100000
For the exact syntax references please see online documentation here:
https://tradingview.to/mt4
https://tradingview.to/mt5

Save the alert and wait for the alert to trigger (on the 1h TF it can take a while).
Now we can see the trade opening properly in our Telegram channel.
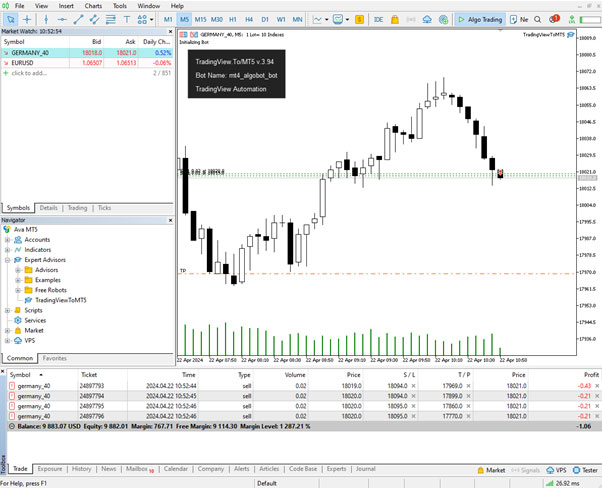
And in MT4/MT5
Cornix: Follow our Telegram Algobot VIP groups
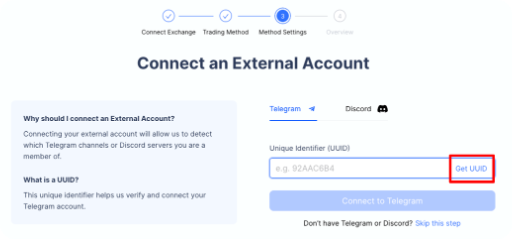
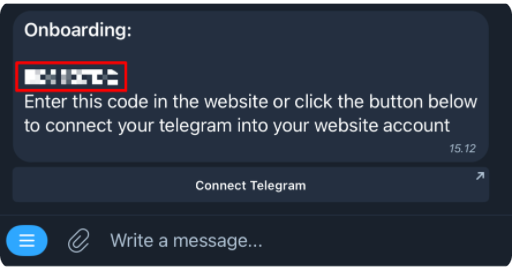
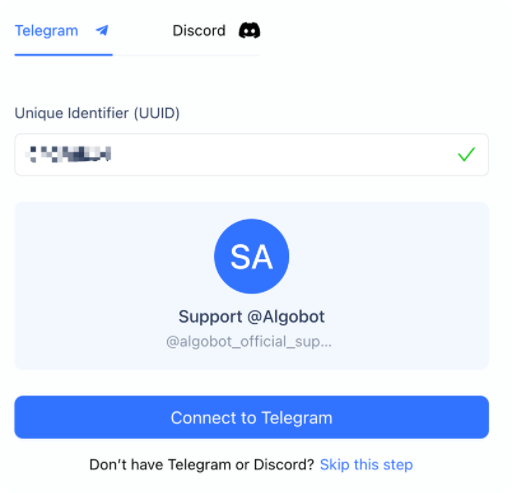
To connect our Telegram account we need to get the UUID first. Click “Get UUID”.
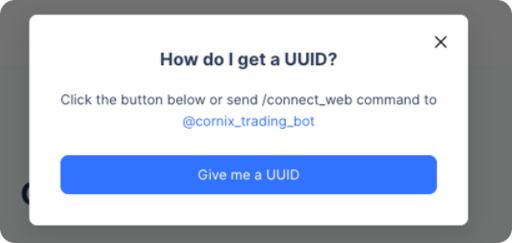
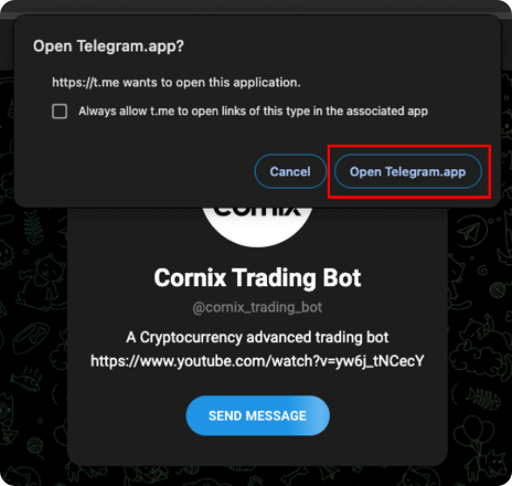
In your chat with @cornix_trading_bot you will find the UUID code. Copy and paste.
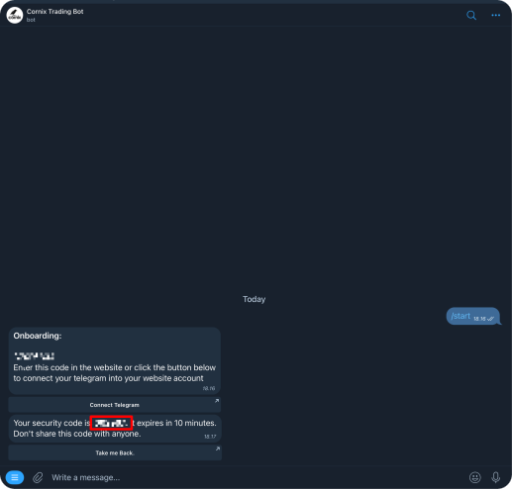
The Cornix bot asks to verify the Telegram account and will send a verification code in the Telegram chat. Copy and paste.

Select the Algobot channel and follow our VIP group
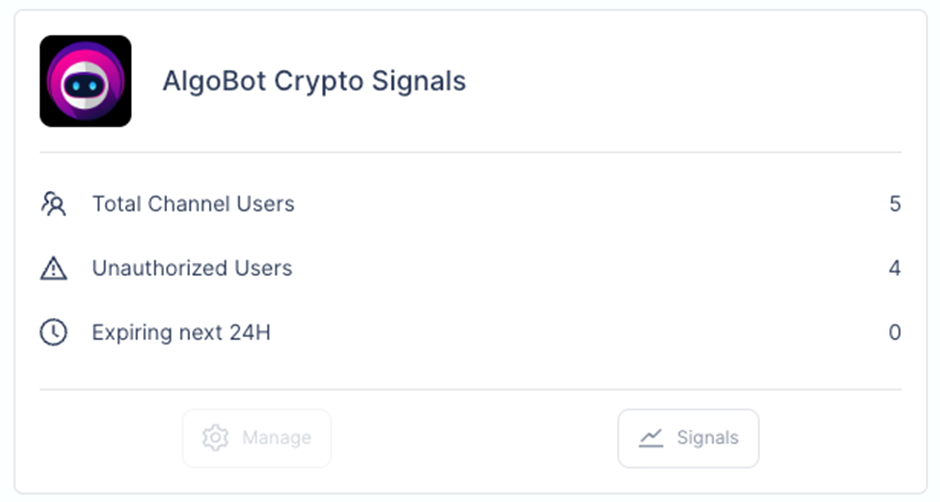
And all is set up!